【EMCC】Oracle Enterprise Manager Cloud Control 12.1.0.5 OEM server agent 安装配置及监控MySQL数据库
原文: https://www.cnblogs.com/hmwh/p/8649751.html
https://www.cnblogs.com/hmwh/p/9761138.html
http://www.cnblogs.com/hmwh/p/8657498.html
Oracle 12c(12.1.0.5)OEM server agent 安装配置
注意:
此文档为生产上操作文档,省略了IP,oracle用户server,agent 端至少需要sudo,ping,ssh,创建目录权限
一、安装要求 1.1. 系统情况一览IP
数据库
OEM
操作系统
数据库版本
XX1
单机
service(12.1.0.5)
Linux 6.7
oracle11.2.0.4
XX2
RAC
agent
Linux 6.7
Oracle11.2.0.4
XX3
RAC
agent
Linux 6.7
Oracle11.2.0.4
注意:OEM管理RAC数据库需要先添加主机,集群高可用服务(也可以直接添加数据库,不添加高可用服务,后续文档补充),后添加数据库;单机先添加主机(不用添加集群高可用服务),后添加数据库,GC服务器很耗资源,需要安装oracle软件,创建实例再配置OEM服务端,agent端,建议服务端32G+内存。
1.2. 操作系统要求安装Enterprise Manager Cloud Control 12c的硬件要求如以下列表,要求至少4G内存,
Linux 6.X 需要的依赖包如下:
yum -y install make binutils gcc libaio glibc-common libstdc++ sysstat glibc-devel glibc-devel
linux 5.X的依赖包如下:
yum -y install make binutils gcc libaio glibc-common libstdc setarch sysstat rng-utils libXtst xorg-x11-utils
注意: server和agent端都需要安装依赖包
1.3. 软件要求需要的软件包:
em12105_linux64_disk1
em12105_linux64_disk2
em12105_linux64_disk3
下载地址:
http://www.oracle.com/technetwork/oem/grid-control/downloads/linuxx8664soft-085949.html
1.4. 数据库要求
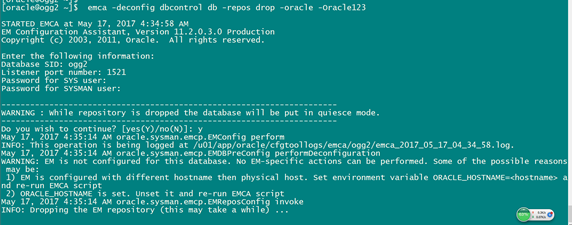
如果数据库配置了dbcontrol,使用如下命令将其删除:
SYSMAN_PWD: Password for SYSMAN user
SYS_PWD: Password for SYS user
$ emca -deconfig dbcontrol db -repos drop -SYS_PWD -SYSMAN_PWD
删除EM案例:
$ emca -deconfig dbcontrol db -repos drop -oracle -Oracle123
创建目录
mkdir -p /u01/app/oracle/Middleware/
mkdir -p /u01/app/oracle/agent
chown -R oracle:oinstall /u01/app/oracle/Middleware
chown -R oracle:oinstall /u01/app/oracle/agent
解压文件(同一个目录解压)
unzip em12105_linux64_disk1
unzip em12105_linux64_disk2
unzip em12105_linux64_disk3
二、开始安装Oracle 12c OEM 2.1. 安装Oracle 12c OEM server注意:确保安装目录空间至少14G
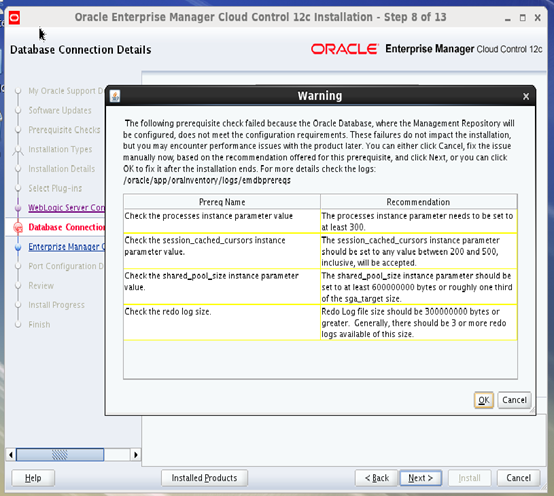
修改一下参数:
可酌情修改参数,GC服务器很耗资源,建议参数不要太小。

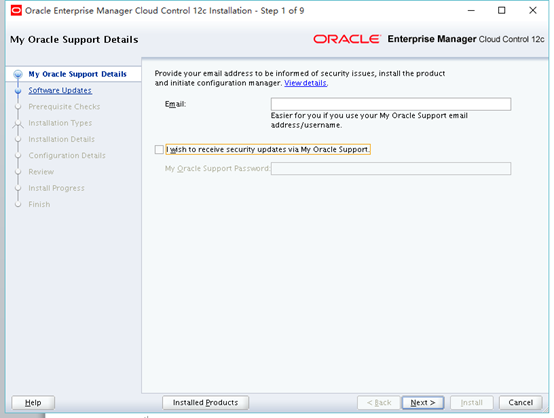
oracle用户进入解压目录,运行./runInstaller
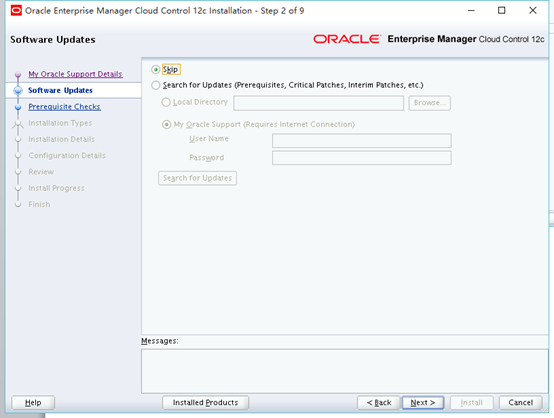
选择”Skip”跳过更新,点击NEXT
Prerequisite checks安装检测,如遇报错,请根据提示修改(或者忽略),点击NEXT

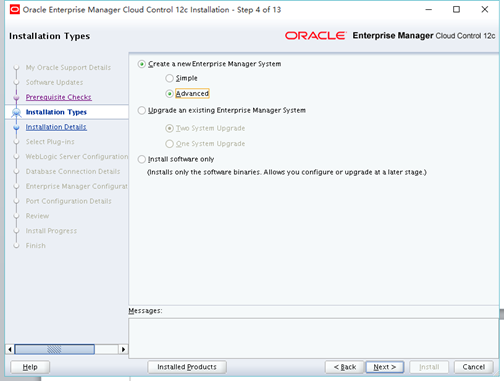
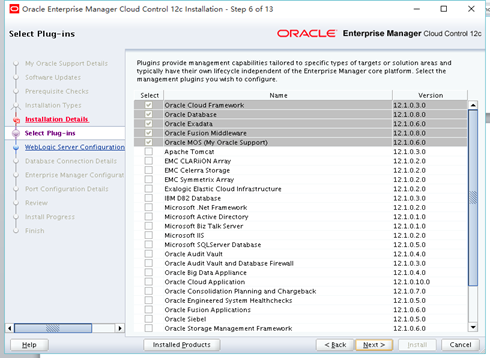
定制版本:
安装目录选择,middleware HOME目录一定要为空
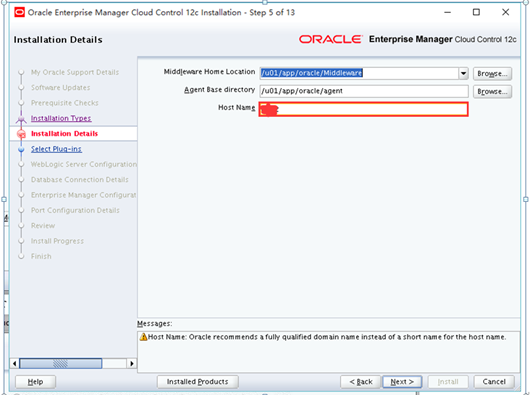
Host name 可以不为域名格式
用户名密码设置:
weblogic/XXX
sysman/XXX
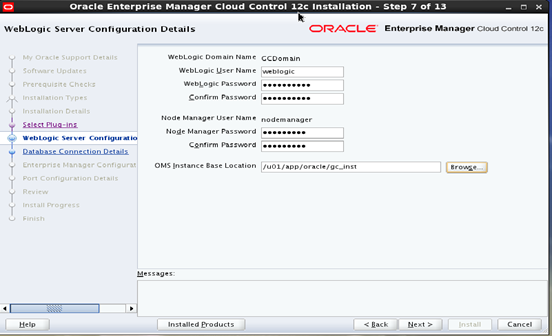
配置oem服务用户名和密码:
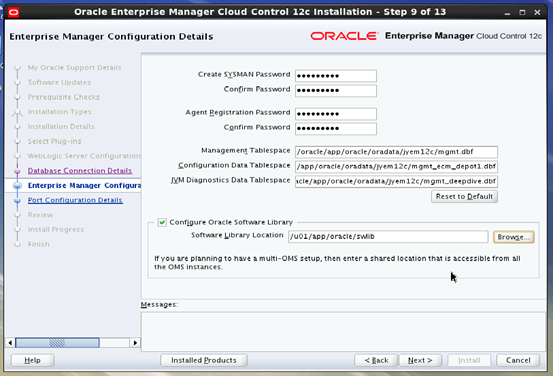
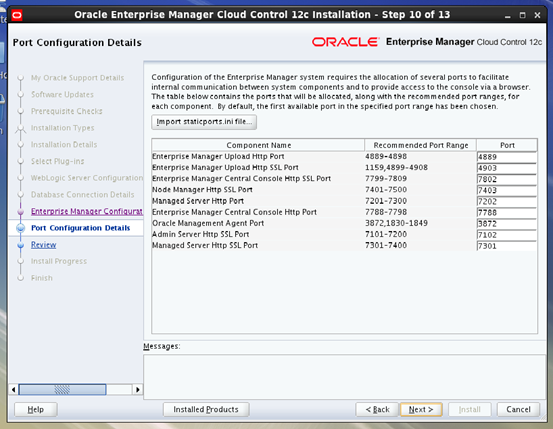
服务端口号设置:默认即可:
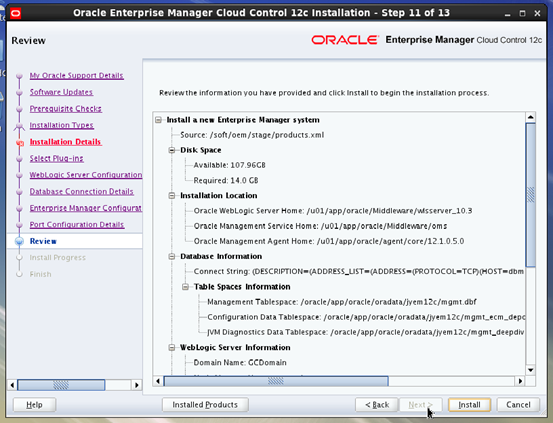
下一步:

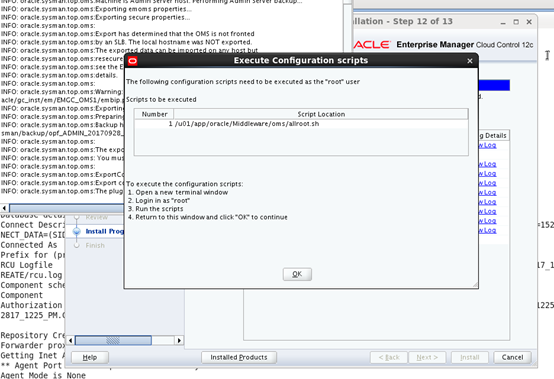
执行脚本:

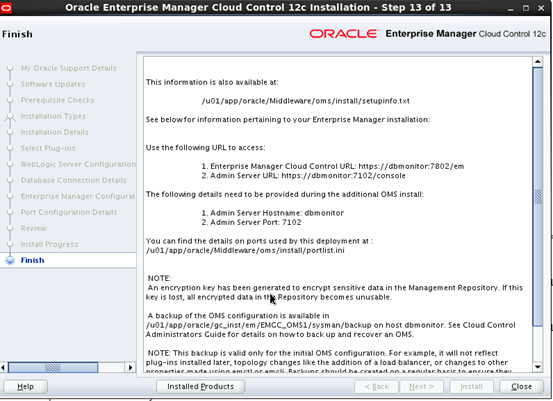
查看服务器端的OEM 状态:
/u01/app/oracle/Middleware/oms/bin/emctl status oms

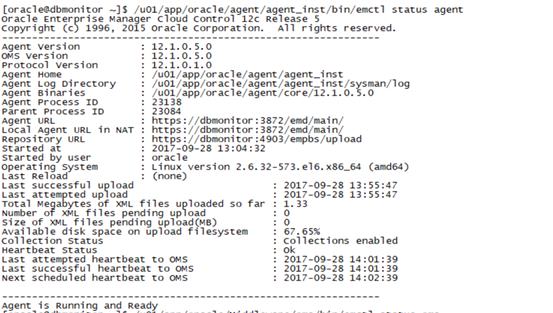
查看服务器端agent状态:
/u01/app/oracle/agent/agent_inst/bin/emctl status agent
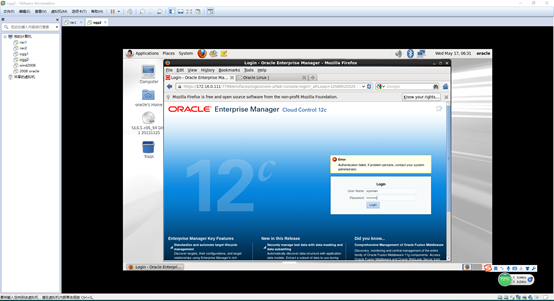
控制台地址:
https://IP:7802/em
启动OEM时,需要先启动所在oms服务器的数据库,以及中间件控制台,最后启动OMS(安装完成后,默认已启动),启动中间件管理台(默认服务器重启会自动启动):
Root:
nohup /u01/app/oracle/gc_inst/user_projects/domains/GCDomain/bin/startWebLogic.sh &
控制台地址:
https:// IP:7102/console
启动oms:
Oracle:
/u01/app/oracle/Middleware/oms/bin/emctl start oms -all
启动客户端:
/u01/app/oracle/agent/agent_inst/bin/emctl start agent
2.2. 服务端配置
vi /etc/hosts
IP hostname
[root@xxserver agent]# ln -s /usr/bin/sudo /usr/local/bin/sudo
[root@xxserver agent]# ls -lh /usr/local/bin/sudo
lrwxrwxrwx. 1 root root 13 Oct 9 11:08 /usr/local/bin/sudo -> /usr/bin/sudo
[root@xxserver agent]# ls -lh /usr/bin/sudo
---s--x--x. 1 root root 121K May 6 2015 /usr/bin/sudo
[root@xxserver agent]# ls -l /etc/sudoers
-r--r-----. 1 root root 4002 Mar 2 2012 /etc/sudoers
[root@xxserver agent]# vi /etc/sudoers
打开/etc/sudoers 将以下三处修改
修改前:
Defaults requiretty
修改后:
Defaults:oracle !requiretty
修改前:
Defaults !visiblepw
修改后:
Defaults visiblepw
修改前:
##
## Allow root to run any commands anywhere
root ALL=(ALL) ALL
修改后
##
## Allow root to run any commands anywhere
root ALL=(ALL) ALL
oracle ALL=(ALL) ALL --这里加一行
以上三处修改完成后,save 文件
测试 oracle 能否正常 sudo
[oracle@xxserver ~]$ ls -lh /root/
ls: cannot open directory /root/: Permission denied
[oracle@xxserver ~]$ sudo ls -l /root
We trust you have received the usual lecture from the local System
Administrator. It usually boils down to these three things:
#1) Respect the privacy of others.
#2) Think before you type.
#3) With great power comes great responsibility.
[sudo] password for oracle:
total 104
-rw-------. 1 root root 1554 Sep 27 17:04 anaconda-ks.cfg
drwxr-xr-x. 2 root root 4096 Sep 27 17:06 Desktop
drwxr-xr-x. 2 root root 4096 Sep 27 17:06 Documents
drwxr-xr-x. 2 root root 4096 Sep 27 17:06 Downloads
-rw-r--r--. 1 root root 51940 Sep 27 17:04 install.log
-rw-r--r--. 1 root root 10259 Sep 27 17:02 install.log.syslog
drwxr-xr-x. 2 root root 4096 Sep 27 17:06 Music
drwxr-xr-x. 2 root root 4096 Sep 27 17:06 Pictures
drwxr-xr-x. 2 root root 4096 Sep 27 17:06 Public
drwxr-xr-x. 2 root root 4096 Sep 27 17:06 Templates
drwxr-xr-x. 2 root root 4096 Sep 27 17:06 Videos
2.3. 安装agent
2.3.1 . 前期环境准备
mkdir -p /u01/agent/
chmod oracle.oinstall /u01/agent
注意:
1./u01/agent/ 一定要为空。
2.所有监控服务器/etc/hosts 配置域名解析
3.所有服务器做以下sudo文件配置:
确保/usr/local/bin/sudo 这个符号链接存在
ROOT:
ln -s /usr/bin/sudo /usr/local/bin/sudo
ls -l /etc/sudoers
-r--r----- 1 root root 3407 Oct 18 19:30 /etc/sudoers
cp /etc/sudoers /etc/sudoers.bak
打开/etc/sudoers 将以下三处修改
修改前:
Defaults requiretty
修改后:
Defaults:oracle !requiretty
修改前:
Defaults !visiblepw
修改后:
Defaults visiblepw
修改前:
##
## Allow root to run any commands anywhere
root ALL=(ALL) ALL
修改后
##
## Allow root to run any commands anywhere
root ALL=(ALL) ALL
oracle ALL=(ALL) ALL --这里加一行
以上三处修改完成后,save 文件
测试 oracle 能否正常 sudo
su - oracle
ls -l /root
ls: /root: Permission denied
sudo ls -l /root
[sudo] password for oracle:
total 88
-rw------- 1 root root 1832 Aug 11 05:26 anaconda-ks.cfg
drwxr-xr-x 2 root root 4096 Aug 10 21:31 Desktop
-rw-r--r-- 1 root root 56307 Aug 11 05:26 install.log
-rw-r--r-- 1 root root 4136 Aug 11 05:26 install.log.syslog
同理设置其他被管理端(agent):(xxhost1)为例:
[root@xxhost1 u01]# mkdir -p /app/u01/agent/
[root@xxhost1 u01]# chown -R oracle:oinstall /app/u01/agent
[root@xxhost1 u01]# cat /etc/hosts
IP hostname
[root@xxhost1 u01]# ls -lh /usr/bin/sudo
---s--x--x. 1 root root 121K May 6 2015 /usr/bin/sudo
[root@xxhost1 u01]# ls -l /etc/sudoers
-r--r-----. 1 root root 4002 Mar 2 2012 /etc/sudoers
[root@xxhost1 u01]# ls -lh /usr/local/bin/sudo
ls: cannot access /usr/local/bin/sudo: No such file or directory
[root@xxhost1 u01]# ln -s /usr/bin/sudo /usr/local/bin/sudo
[root@xxhost1 u01]# ls -lh /usr/local/bin/sudo
lrwxrwxrwx 1 root root 13 Oct 9 11:27 /usr/local/bin/sudo -> /usr/bin/sudo
[root@xxhost1 u01]# cp /etc/sudoers /etc/sudoers.bak
[root@xxhost1 u01]# chmod 755 /etc/sudoers
打开/etc/sudoers 将以下三处修改
修改前:
Defaults requiretty
修改后:
Defaults:oracle !requiretty
修改前:
Defaults !visiblepw
修改后:
Defaults visiblepw
修改前:
##
## Allow root to run any commands anywhere
root ALL=(ALL) ALL
修改后
##
## Allow root to run any commands anywhere
root ALL=(ALL) ALL
oracle ALL=(ALL) ALL --这里加一行
以上三处修改完成后,save 文件
测试 oracle 能否正常 sudo
[root@xxhost1 u01]# su - oracle
[oracle@xxhost1 ~]$ ls -lh /root/
ls: cannot open directory /root/: Permission denied
[oracle@xxhost1 ~]$ sudo ls -lh /root/
We trust you have received the usual lecture from the local System
Administrator. It usually boils down to these three things:
#1) Respect the privacy of others.
#2) Think before you type.
#3) With great power comes great responsibility.
[sudo] password for oracle:
total 84K
-rw-------. 1 root root 1.7K Aug 1 08:07 anaconda-ks.cfg
drwxr-xr-x 2 root root 4.0K Aug 7 06:38 Desktop
drwxr-xr-x 2 root root 4.0K Aug 7 06:38 Documents
drwxr-xr-x 2 root root 4.0K Aug 7 06:38 Downloads
-rw-r--r--. 1 root root 29K Aug 1 08:07 install.log
-rw-r--r--. 1 root root 8.5K Aug 1 08:06 install.log.syslog
drwxr-xr-x 2 root root 4.0K Aug 7 06:38 Music
drwxr-xr-x 2 root root 4.0K Aug 7 06:38 Pictures
drwxr-xr-x 2 root root 4.0K Aug 7 06:38 Public
-rw-r--r--. 1 root root 358 Aug 1 08:07 redhat.repo_bak
drwxr-xr-x 2 root root 4.0K Aug 7 06:38 Templates
drwxr-xr-x 2 root root 4.0K Aug 7 06:38 Videos
mkdir -p /agent
chown -R oracle:oinstall /agent
其他:
说明:由于主机做了ssh 远程限制,需要修改监控服务器以及所有被监控主机以下参数文件:
vi /etc/ssh/sshd_config
添加以下:
Ciphers aes128-cbc,aes192-cbc,aes256-cbc,aes128-ctr,aes192-ctr,aes256-ctr,3des-cbc,arcfour128,arcfour256,arcfour,blowfish-cbc,cast128-cbc
MACs hmac-md5,hmac-sha1,umac-64@openssh.com,hmac-ripemd160,hmac-sha1-96,hmac-md5-96
KexAlgorithms diffie-hellman-group1-sha1,diffie-hellman-group14-sha1,diffie-hellman-group-exchange-sha1,diffie-hellman-group-exchange-sha256,ecdh-sha2-nistp256,ecdh-sha2-nistp384,ecdh-sha2-nistp521,diffie-hellman-group1-sha1,curve25519-sha256@libssh.org
重启sshd 服务:service sshd restart
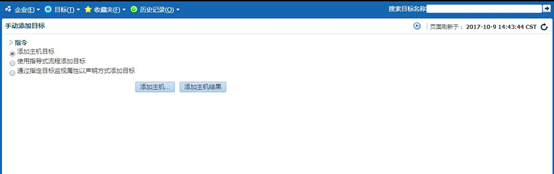
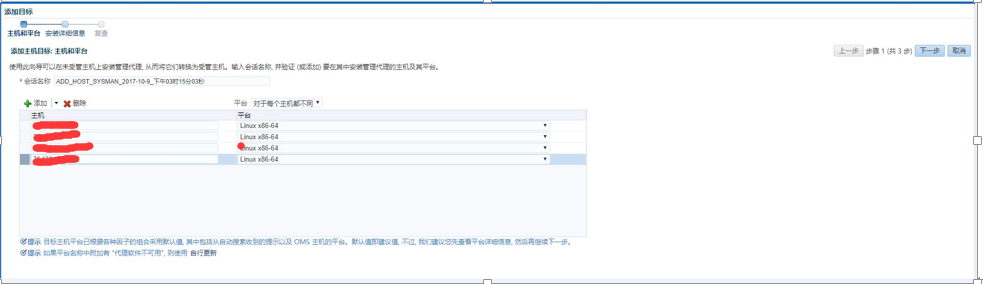
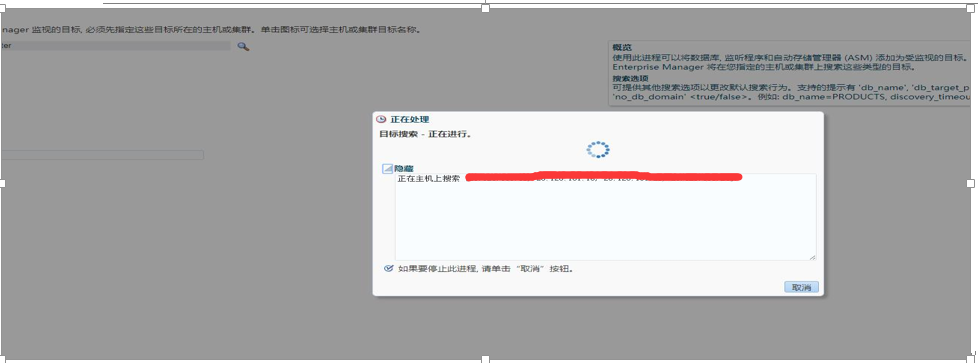
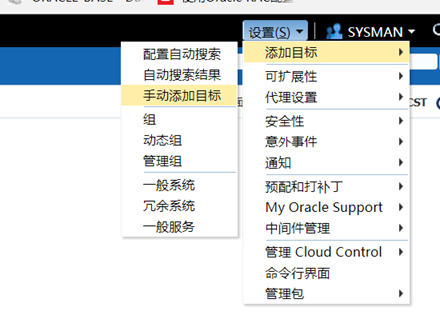
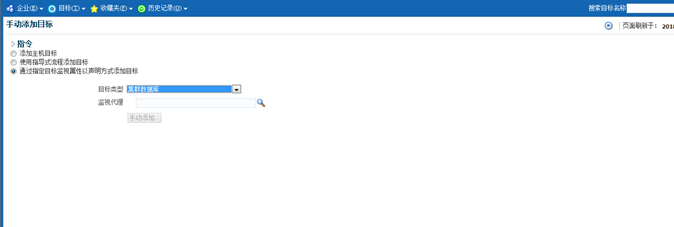
2.3.2 . 安装agent
设置 -> 添加目标 ->手动添加目标
静默安装agent参照:http://www.cnblogs.com/hmwh/p/8657498.html

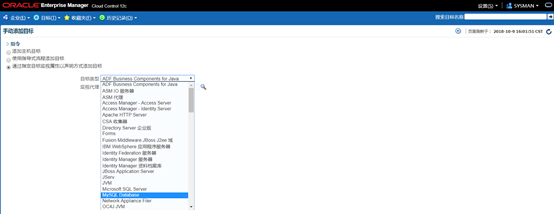
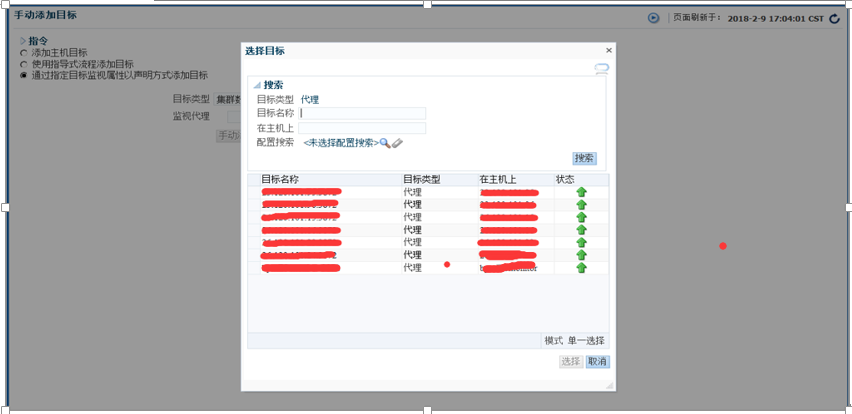
添加需要监控的数据库:
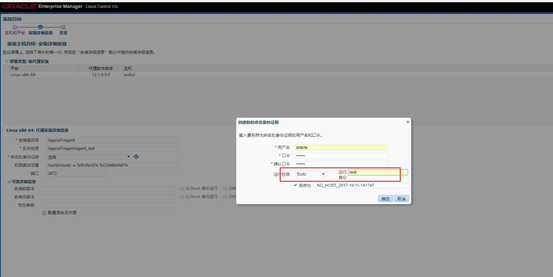
next:
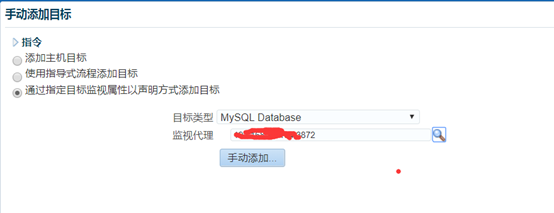
点击OK,然后next 出现以下,注意红色图,填完配置:
下一步部署agent:
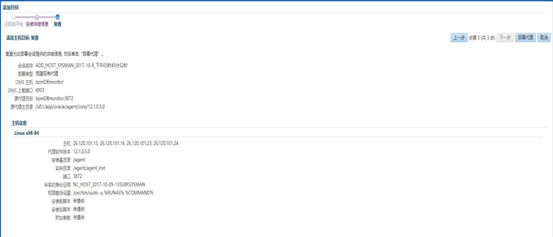
下一步:
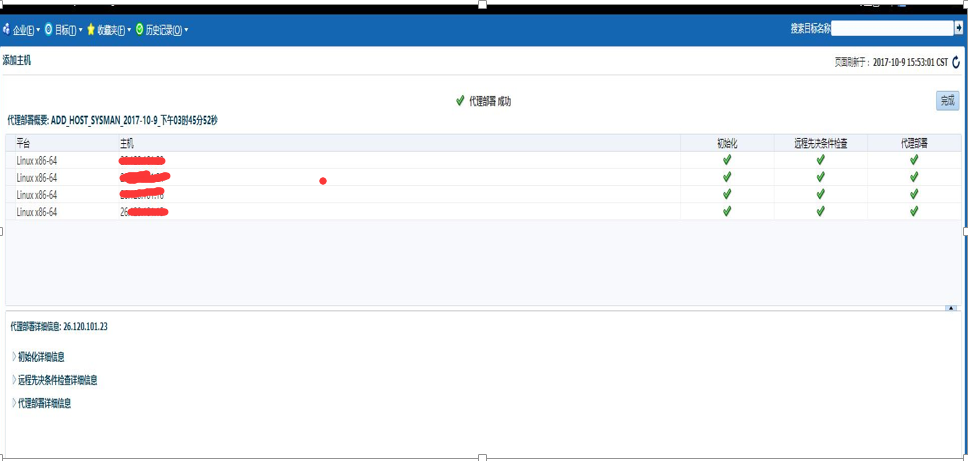
添加成功
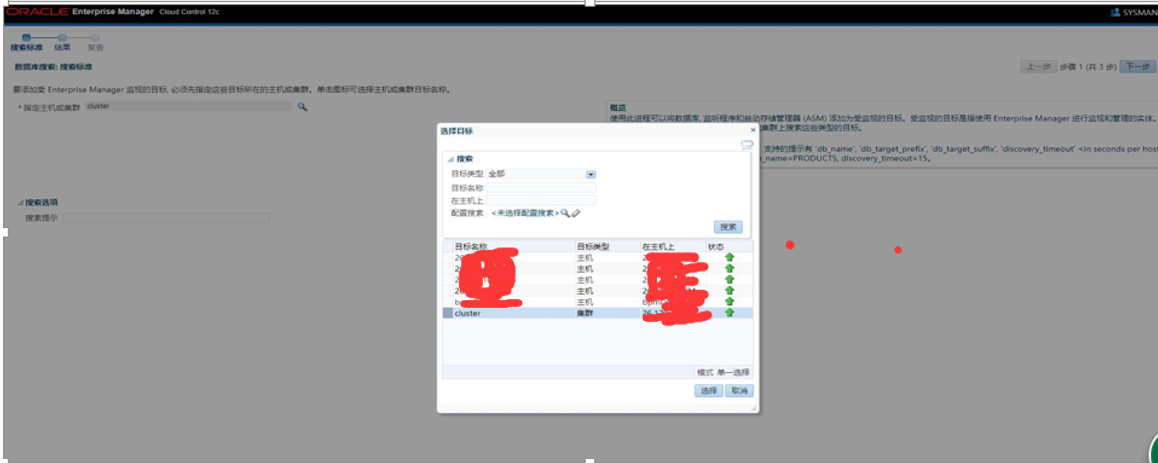
2.4. 添加集群服务
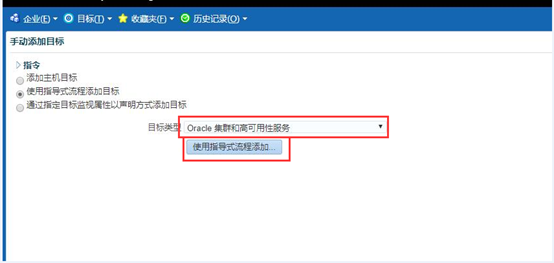
下一步:
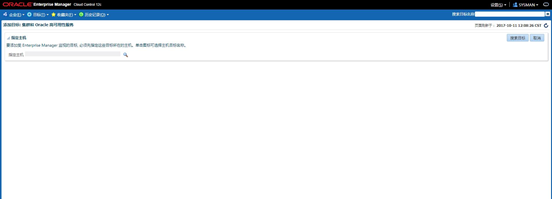
下一步:
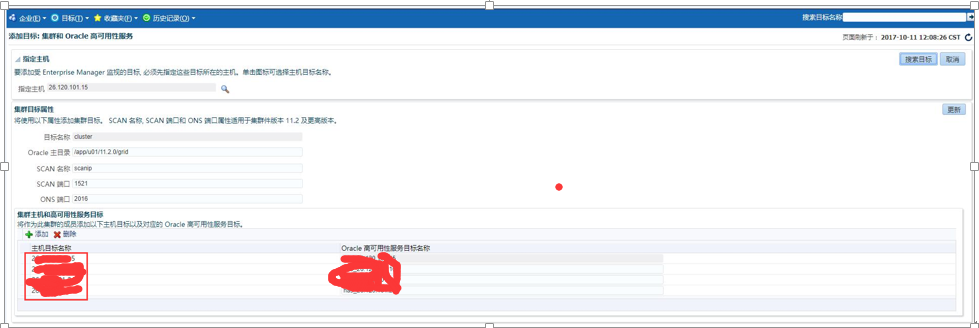
进行保存(已添加过可以更新)
上图可以根据选择添加主机的集群高可用服务。
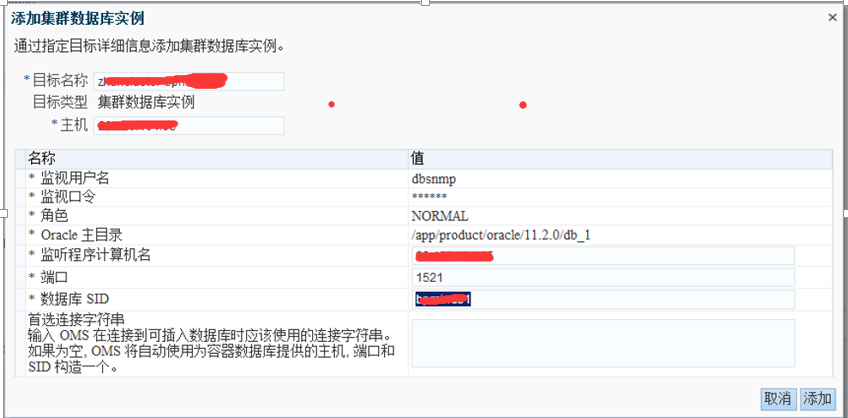
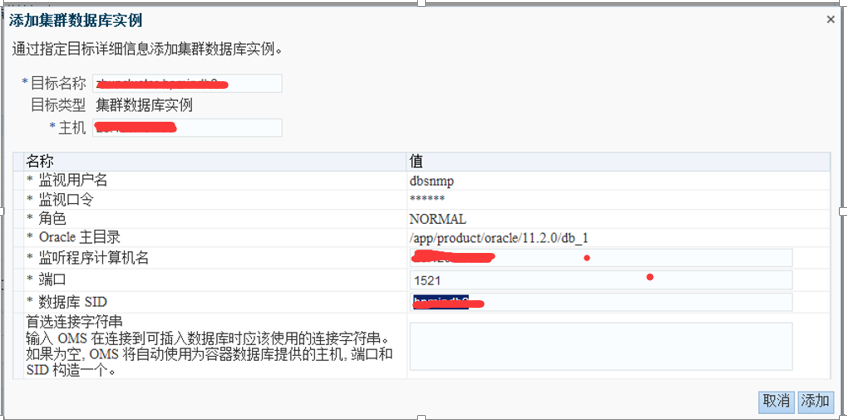
2.5. 添加管理的数据库点击 Target -> Database -> add 添加数据库配置信息:(注意,如果有多套cluster 数据库添加,也可以用这种办法添加:http://www.cnblogs.com/hmwh/p/8657498.html)
Next
Next:
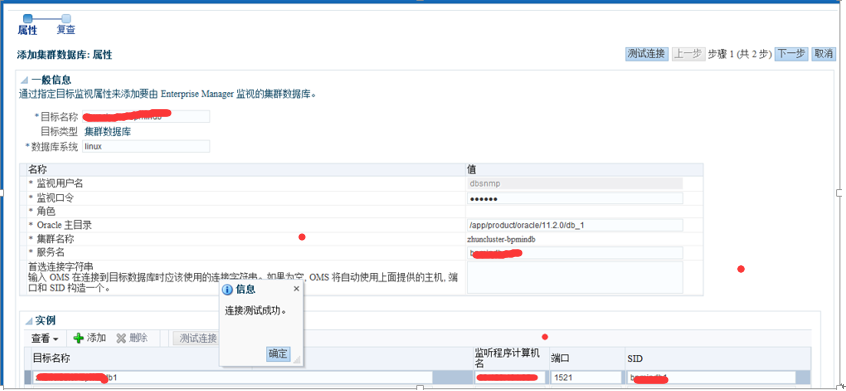
注意以下图需要配置1,2,3:
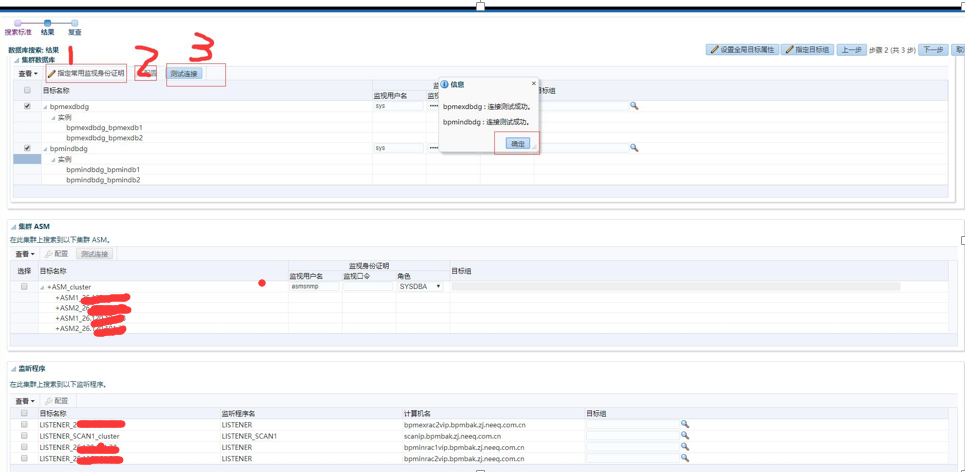
依次配置1,2,3;配置2的时候,设置实例->监听程序计算机名,需要设置IP,最好不要写成域名。
Next:
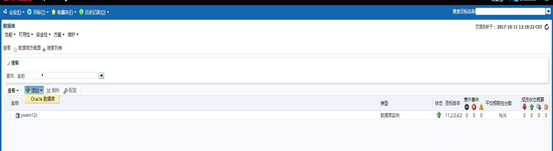
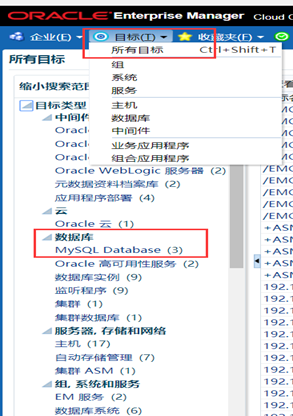
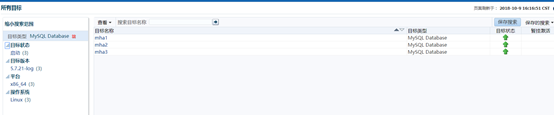
看添加成功的数据库:
目标->数据库
OEM12C(12.1.0.5)安装插件监控mysql(linux)
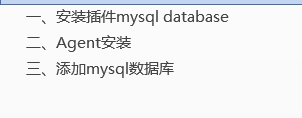
目录结构:
文章参考论坛: https://blog.csdn.net/u010719917/article/details/78128200
环境说明:
oms:12.1.0.5 os:centos 6.X
MYSQL: 5.7.21 OS:centos 7.X
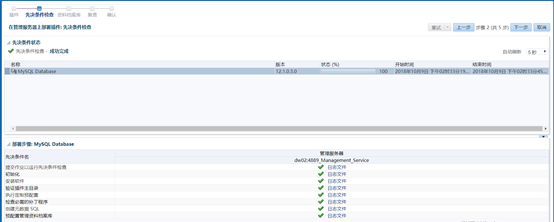
一、安装插件mysql database
下载地址:
https://updates.oracle.com/Orion/Services/download/p22047385_112000_Generic.zip?aru=19479462&patch_file=p22047385_112000_Generic.zip
下载完成后,上传至oem oms,并进行导入。
/orabackup/oeminstall/Middleware/oms/bin/emcli login -username=sysman -password=密码
/orabackup/oeminstall/Middleware/oms/bin/emcli import_update -omslocal -file=/oracle/p22047385_112000_Generic.zip
Oracle用户执行:


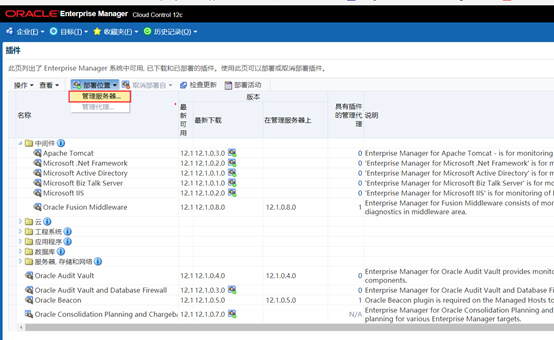
添加mysql 数据库插件:


二、Agent安装
Agent安装参考我之前的博客:
由于MySQL 数据库服务器没有oracle用户,root安装不能图形界面安装,所以操作系统我新建的oracle用户安装agent。
静默安装:
https://www.cnblogs.com/hmwh/p/8657498.html
图形界面安装:
https://www.cnblogs.com/hmwh/p/8649751.html
安装完后如下:
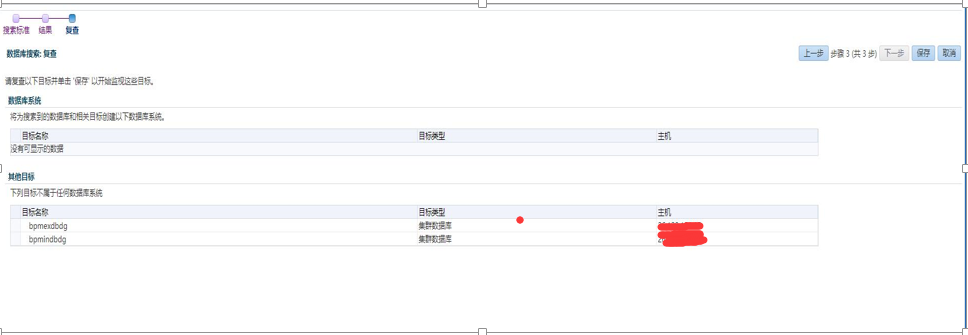
三、添加mysql数据库
新建监控用户:
GRANT SELECT, RELOAD, PROCESS, SUPER on *.* to 'sysman'@'%' identified by 'XXX' ;
GRANT SELECT, RELOAD, PROCESS on *.* to 'sysman'@'%';
flush privileges;
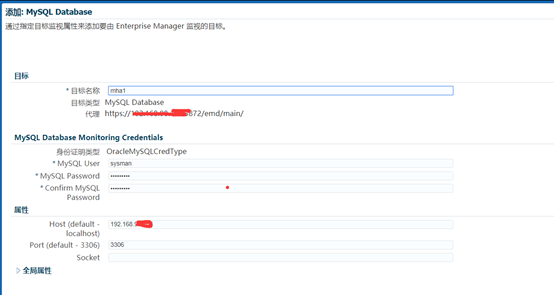
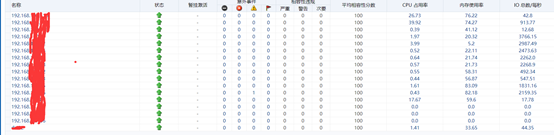
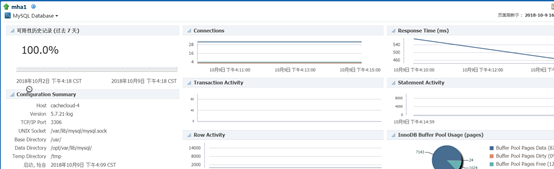
添加完后如下:
注释:
文章来自oracle support 文档 ID 1360083.1,静默安装agent采用的是把OMS服务端(即oem server端)的agent用压缩包download,远程传到agent端,利用编译的rsp文件进行编译,静默安装agent。
1、server参数配置参照:http://www.cnblogs.com/hmwh/p/8649751.html
2、agent参数配置参照:http://www.cnblogs.com/hmwh/p/8649751.html
3、silent install(静默安装) agent
[oracle@bpmDBmonitor oracle]$ /u01/app/oracle/Middleware/oms/bin/emcli login -username=sysman Error: Already logged in as user "sysman". Use "emcli logout" to logout the current user. 未登陆需要提示登陆输入密码
[oracle@bpmDBmonitor oracle]$ /u01/app/oracle/Middleware/oms/bin/emcli get_supported_platforms
----------------------------------------------- Version = 12.1.0.5.0 Platform = Linux x86-64 ----------------------------------------------- Platforms list displayed successfully. [oracle@bpmDBmonitor oracle]$ pwd /u01/app/oracle [oracle@bpmDBmonitor oracle]$ ls -lh total 16K drwxr-xr-x. 6 oracle oinstall 4.0K Sep 28 17:16 agent drwxr-xr-x. 6 oracle oinstall 4.0K Sep 28 17:07 gc_inst drwxr-x---. 16 oracle oinstall 4.0K Sep 28 17:07 Middleware drwxr-xr-x. 75 oracle oinstall 4.0K Sep 28 17:13 swlib [oracle@bpmDBmonitor oracle]$ mkdir zip [oracle@bpmDBmonitor oracle]$ /u01/app/oracle/Middleware/oms/bin/emcli get_agentimage -destination=/u01/app/oracle/zip/ -platform="Linux x86-64" -version=12.1.0.5.0 === Partition Detail === Space free : 86 GB Space required : 1 GB Check the logs at /u01/app/oracle/gc_inst/em/EMGC_OMS1/sysman/emcli/setup/.emcli/get_agentimage_2018-03-26_16-12-53-PM.log Downloading /u01/app/oracle/zip//12.1.0.5.0_AgentCore_226.zip
查看download agent [oracle@bpmDBmonitor oracle]$ ls -lh zip/ total 246M -rw-r--r--. 1 oracle oinstall 246M Mar 26 16:13 12.1.0.5.0_AgentCore_226.zip
[oracle@bpmDBmonitor oracle]$ scp zip/12.1.0.5.0_AgentCore_226.zip IP:/u01/agent/ Authorized only . All activity will be monitored and reported oracle@bpminrac1's password: stty: standard input: Invalid argument 12.1.0.5.0_AgentCore_226.zip 100% 245MB 106.6MB/s 00:02 [oracle@bpmDBmonitor oracle]$ scp zip/12.1.0.5.0_AgentCore_226.zip bpminrac2:/u01/agent/ The authenticity of host 'bpminrac2 (23.120.101.8)' can't be established. RSA key fingerprint is SHA256:lA7Dqw1jqtfJxTBfVWcuXu2Usv7Q1CFkkeo6qXZL4AY. Are you sure you want to continue connecting (yes/no)? yes Warning: Permanently added 'bpminrac2,23.120.101.8' (RSA) to the list of known hosts. Authorized only . All activity will be monitored and reported oracle@bpminrac2's password: stty: standard input: Invalid argument 12.1.0.5.0_AgentCore_226.zip 100% 245MB 99.3MB/s 00:02 [oracle@bpmDBmonitor oracle]$ cat /tmp/agent.rsp
OMS_HOST=IP EM_UPLOAD_PORT=4903 AGENT_REGISTRATION_PASSWORD=abc123 #AGENT_INSTANCE_HOME= AGENT_PORT=3872 #b_startAgent=true ORACLE_HOSTNAME=XXX #s_agentHomeName=
[oracle@bpmexrac2 tmp]$ sh agentDeploy.sh AGENT_BASE_DIR=/u01/app/agent RESPONSE_FILE=/tmp/agent.rsp Validating the OMS_HOST & EM_UPLOAD_PORT Executing command : /u01/app/agent/core/12.1.0.5.0/jdk/bin/java -classpath /u01/app/agent/core/12.1.0.5.0/jlib/agentInstaller.jar:/u01/app/agent/core/12.1.0.5.0/oui/jlib/OraInstaller.jar oracle.sysman.agent.installer.AgentInstaller /u01/app/agent/core/12.1.0.5.0 /tmp /u01/app/agent AGENT_BASE_DIR=/u01/app/agent RESPONSE_FILE=/tmp/agent.rsp -prereq
Validating oms host & port with url: http://XXX:4903/empbs/genwallet Validating oms host & port with url: https://XXX:4903/empbs/genwallet Return status:3-oms https port is passed Unzipping the agentcoreimage.zip to /u01/app/agent .... 12.1.0.5.0_PluginsOneoffs_226.zip Executing command : /tmp/unzip -o /tmp/12.1.0.5.0_PluginsOneoffs_226.zip -d /u01/app/agent Successfully unzipped /tmp/12.1.0.5.0_PluginsOneoffs_226.zip to /u01/app/agent ! Executing command : /u01/app/agent/core/12.1.0.5.0/jdk/bin/java -classpath /u01/app/agent/core/12.1.0.5.0/oui/jlib/OraInstaller.jar:/u01/app/agent/core/12.1.0.5.0/oui/jlib/xmlparserv2.jar:/u01/app/agent/core/12.1.0.5.0/oui/jlib/srvm.jar:/u01/app/agent/core/12.1.0.5.0/oui/jlib/emCfg.jar:/u01/app/agent/core/12.1.0.5.0/jlib/agentInstaller.jar:/u01/app/agent/core/12.1.0.5.0/oui/jlib/share.jar oracle.sysman.agent.installer.AgentInstaller /u01/app/agent/core/12.1.0.5.0 /tmp /u01/app/agent /u01/app/agent/agent_inst AGENT_BASE_DIR=/u01/app/agent
Executing agent install prereqs... Executing command: /u01/app/agent/core/12.1.0.5.0/oui/bin/runInstaller -debug -ignoreSysPrereqs -prereqchecker -silent -ignoreSysPrereqs -waitForCompletion -prereqlogloc /u01/app/agent/core/12.1.0.5.0/cfgtoollogs/agentDeploy -entryPoint oracle.sysman.top.agent_Complete -detailedExitCodes PREREQ_CONFIG_LOCATION=/u01/app/agent/core/12.1.0.5.0/prereqs -J-DORACLE_HOSTNAME=bpmexrac2.biz.jy.neeq.com.cn -J-DAGENT_PORT=3872 -J-DAGENT_BASE_DIR=/u01/app/agent
Agent install prereqs completed successfully
Cloning the agent home... Executing command: /u01/app/agent/core/12.1.0.5.0/oui/bin/runInstaller -debug -ignoreSysPrereqs -clone -forceClone -silent -waitForCompletion -nowait ORACLE_HOME=/u01/app/agent/core/12.1.0.5.0 -responseFile /tmp/agent.rsp AGENT_BASE_DIR=/u01/app/agent AGENT_BASE_DIR=/u01/app/agent RESPONSE_FILE=/tmp/agent.rsp -noconfig ORACLE_HOME_NAME=agent12c1 -force b_noUpgrade=true EMCTLCFG_MODE=NONE
Cloning of agent home completed successfully
Attaching sbin home... Executing command: /u01/app/agent/core/12.1.0.5.0/oui/bin/runInstaller -debug -ignoreSysPrereqs -attachHome -waitForCompletion -nowait ORACLE_HOME=/u01/app/agent/sbin ORACLE_HOME_NAME=sbin12c1 -force
Attach home for sbin home completed successfully.
Updating home dependencies... Executing command: /u01/app/agent/core/12.1.0.5.0/oui/bin/runInstaller -debug -ignoreSysPrereqs -updateHomeDeps -waitForCompletion HOME_DEPENDENCY_LIST={/u01/app/agent/sbin:/u01/app/agent/core/12.1.0.5.0} -invPtrLoc /u01/app/agent/core/12.1.0.5.0/oraInst.loc -force
Update home dependency completed successfully. Executing command: /u01/app/agent/core/12.1.0.5.0/oui/bin/runConfig.sh ORACLE_HOME=/u01/app/agent/core/12.1.0.5.0 RESPONSE_FILE=/u01/app/agent/core/12.1.0.5.0/agent.rsp ACTION=configure MODE=perform COMPONENT_XML={oracle.sysman.top.agent.11_1_0_1_0.xml} RERUN=true Agent Configuration completed successfully
The following configuration scripts need to be executed as the "root" user. #!/bin/sh #Root script to run /u01/app/agent/core/12.1.0.5.0/root.sh To execute the configuration scripts: 1. Open a terminal window 2. Log in as "root" 3. Run the scripts Agent Deployment Successful. Agent deployment log location: /u01/app/agent/core/12.1.0.5.0/cfgtoollogs/agentDeploy/agentDeploy_2018-03-26_17-49-59-PM.log Agent deployment completed successfully. [oracle@bpmexrac2 tmp]$ /u01/app/agent/core/12.1.0.5.0/root.sh This script must be run as root [oracle@bpmexrac2 tmp]$ exit logout [root@bpmexrac2 app]# /u01/app/agent/core/12.1.0.5.0/root.sh Finished product-specific root actions. /etc exist
Creating /etc/oragchomelist file... [oracle@bpmexrac2 bin]$ cd /u01/app/agent/agent_inst/bin [oracle@bpmexrac2 bin]$ ./emctl start agent Oracle Enterprise Manager Cloud Control 12c Release 5 Copyright (c) 1996, 2015 Oracle Corporation. All rights reserved. Agent is already running [oracle@bpmexrac2 bin]$ ./emctl status agent Oracle Enterprise Manager Cloud Control 12c Release 5 Copyright (c) 1996, 2015 Oracle Corporation. All rights reserved. --------------------------------------------------------------- Agent Version : 12.1.0.5.0 OMS Version : 12.1.0.5.0 Protocol Version : 12.1.0.1.0 Agent Home : /u01/app/agent/agent_inst Agent Log Directory : /u01/app/agent/agent_inst/sysman/log Agent Binaries : /u01/app/agent/core/12.1.0.5.0 Agent Process ID : 26923 Parent Process ID : 26755 Agent URL : https://bpmexrac2.biz.jy.neeq.com.cn:3872/emd/main/ Local Agent URL in NAT : https://bpmexrac2.biz.jy.neeq.com.cn:3872/emd/main/ Repository URL : https://bpmDBmonitor:4903/empbs/upload Started at : 2018-03-26 17:51:28 Started by user : oracle Operating System : Linux version 2.6.32-573.el6.x86_64 (amd64) Last Reload : (none) Last successful upload : 2018-03-26 17:51:41 Last attempted upload : 2018-03-26 17:51:41 Total Megabytes of XML files uploaded so far : 0 Number of XML files pending upload : 0 Size of XML files pending upload(MB) : 0 Available disk space on upload filesystem : 64.53% Collection Status : Collections enabled Heartbeat Status : Ok Last attempted heartbeat to OMS : 2018-03-26 17:52:32 Last successful heartbeat to OMS : 2018-03-26 17:52:32 Next scheduled heartbeat to OMS : 2018-03-26 17:53:32
--------------------------------------------------------------- Agent is Running and Ready
4、添加RAC监控数据库
点击 Target -> Database -> add 添加数据库配置信息:
如果此方法行不通,可参照:http://www.cnblogs.com/hmwh/p/8649751.html 添加高可用服务,再添加数据库。
点击搜索按钮:


测试连接:
同理添加节点2实例2:
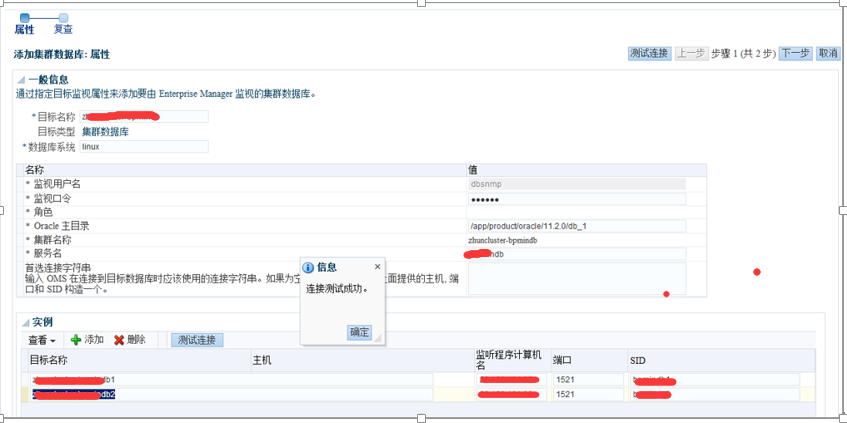
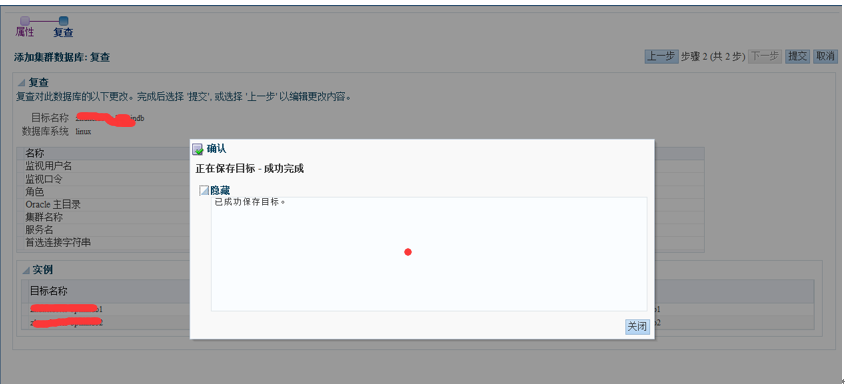
完成后结果如下:

About Me
........................................................................................................................
● 本文作者:小麦苗,部分内容整理自网络,若有侵权请联系小麦苗删除
● 本文在itpub( http://blog.itpub.net/26736162 )、博客园( http://www.cnblogs.com/lhrbest )和个人weixin公众号( xiaomaimiaolhr )上有同步更新
● 本文itpub地址: http://blog.itpub.net/26736162
● 本文博客园地址: http://www.cnblogs.com/lhrbest
● 本文pdf版、个人简介及小麦苗云盘地址: http://blog.itpub.net/26736162/viewspace-1624453/
● 数据库笔试面试题库及解答: http://blog.itpub.net/26736162/viewspace-2134706/
● DBA宝典今日头条号地址: http://www.toutiao.com/c/user/6401772890/#mid=1564638659405826
........................................................................................................................
● QQ群号: 230161599 (满) 、618766405
● weixin群:可加我weixin,我拉大家进群,非诚勿扰
● 联系我请加QQ好友 ( 646634621 ) ,注明添加缘由
● 于 2018-10-01 06:00 ~ 2018-10-31 24:00 在魔都完成
● 最新修改时间:2018-10-01 06:00 ~ 2018-10-31 24:00
● 文章内容来源于小麦苗的学习笔记,部分整理自网络,若有侵权或不当之处还请谅解
● 版权所有,欢迎分享本文,转载请保留出处
........................................................................................................................
● 小麦苗的微店 : https://weidian.com/s/793741433?wfr=c&ifr=shopdetail
● 小麦苗出版的数据库类丛书 : http://blog.itpub.net/26736162/viewspace-2142121/
● 小麦苗OCP、OCM、高可用网络班 : http://blog.itpub.net/26736162/viewspace-2148098/
● 小麦苗腾讯课堂主页 : https://lhr.ke.qq.com/
........................................................................................................................
使用 weixin客户端 扫描下面的二维码来关注小麦苗的weixin公众号( xiaomaimiaolhr )及QQ群(DBA宝典)、添加小麦苗weixin, 学习最实用的数据库技术。

........................................................................................................................

来自 “ ITPUB博客 ” ,链接:http://blog.itpub.net/26736162/viewspace-2216862/,如需转载,请注明出处,否则将追究法律责任。