
目录
您可能也有兴趣
技术栈
安装
创建ASP.NET WebApi项目
配置
依赖注入和选项模型
MongoDB配置
MongoDB .NET驱动程序
模型
定义数据库上下文
添加存储库
添加主控制器
添加管理员控制器
启动设定
运行项目
使用Robo 3T
在GitHub上运行项目
允许跨域调用(CORS)
完全更新MongoDB文档
测试更新
异常管理
.NET Core中的JSON POST的模型绑定
查询嵌入/嵌套文档
项目已经房子啊GitHub上,您可以直接下载源代码或在本地克隆项目。
您可能也有兴趣- 第1部分–使用MongoDB运行LINQ查询– 如何搜索旅行的好地方(MongoDb LINQ和.NET Core)
- 第2部分– MongoDB中的分页–如何真正避免性能下降?
- 第3部分– MongoDb和LINQ:如何汇总和加入集合
ASP.NET Core Web API具有很大的优势,它可以用作HTTP服务,并且可以由任何客户端应用程序(从台式机到移动设备)进行订阅,也可以安装在Windows,macOS或Linux上。
MongoDB是一种流行的NoSQL数据库,是Web API的出色后端。它们更适合于文档存储类型,而不是关系数据库。本文将介绍如何构建与MongoDB异步连接的.NET Core Web API,并全面支持HTTP GET,PUT,POST和DELETE。
安装这里是所有需要安装的东西:
- Visual Studio Community 2017,包括.NET Core选项
- MongoDB和Robo 3T
启动Visual Studio,然后访问“文件”>“新建项目”>“.Net Core”>“ ASP.NET Core Web应用程序”。 然后
然后

开箱即用的配置支持多种文件格式(JSON,XML或INI)。默认情况下,WebApi项目模板启用了JSON格式。在设置文件中,顺序很重要,并且包含复杂的结构。这是一个具有2级设置结构的数据库连接示例。AppSettings.json –更新文件:
{
  "MongoConnection": {
    "ConnectionString": "mongodb://admin:abc123!@localhost",
    "Database": "NotesDb"
  },

  "Logging": {
    "IncludeScopes": false,
    "Debug": {
      "LogLevel": {
        "Default": "Warning"
      }
    },
    "Console": {
      "LogLevel": {
        "Default": "Warning"
      }
    }
  }
}构造函数注入是实现依赖注入(DI)的最常见方法之一,尽管不是唯一的一种。ASP.NET Core在其解决方案中使用构造函数注入,因此我们也将使用它。ASP.NET Core项目具有一个Startup.cs文件,该文件配置了应用程序将在其中运行的环境。Startup.cs文件还将服务放入ASP.NET Core的“服务”层,该层使依赖项注入成为可能。
为了映射自定义数据库连接设置,我们将添加一个新的Settings类。
namespace NotebookAppApi.Model
{
    public class Settings
    {
        public string ConnectionString;
        public string Database;
    }
}
这是我们修改Startup.cs以便在Options访问器模型中注入设置的方法:
public void ConfigureServices(IServiceCollection services)
{
    // Add framework services.
    services.AddMvc();
    services.Configure(options =>
    {
        options.ConnectionString
			= Configuration.GetSection("MongoConnection:ConnectionString").Value;
        options.Database
			= Configuration.GetSection("MongoConnection:Database").Value;
    });
}
此外,在项目中,可以通过IOptions接口访问设置:
IOptions安装MongoDB之后,您需要配置访问权限以及数据所在的位置。
为此,请在本地创建一个名为mongod.cfg的文件。这将包括设置到MongoDB服务器的数据文件夹以及到MongoDB日志文件的路径,最初无需任何身份验证。请使用您自己的设置更新这些本地路径:
systemLog:
  destination: file
  path: "C:\\tools\\mongodb\\db\\log\\mongo.log"
  logAppend: true
storage:
  dbPath: "C:\\tools\\mongodb\\db\\data"
在命令提示符下运行。这将启动MongoDB服务器,指向已经创建的配置文件(如果服务器安装在自定义文件夹中,请首先更新命令)
"C:\Program Files\MongoDB\Server\3.2\bin\mongod.exe" --config C:\Dev\Data.Config\mongod.cfg服务器启动后(您可以在日志文件中看到详细信息),在命令提示符下运行mongo.exe 。下一步是将管理员用户添加到数据库中。使用完整路径运行mongodb(例如:“C:\Program Files\MongoDB\Server\3.2\bin\mongo.exe”)。

然后将以下代码复制粘贴到控制台中:
use admin
db.createUser(
  {
	user: "admin",
	pwd: "abc123!",
	roles: [ { role: "root", db: "admin" } ]
  }
);
exit;
然后停止服务器并更新配置文件,包括安全选项。
systemLog:
  destination: file
  path: "C:\\tools\\mongodb\\db\\log\\mongo.log"
  logAppend: true
storage:
  dbPath: "C:\\tools\\mongodb\\db\\data"
security:
  authorization: enabled
从现在开始,我们将使用管理员用户连接到MongoDb 。有一个很好的做法,就是不要在正常操作中使用超级用户角色(在我们的案例中为Administrator),但是为了使事情变得简单,我们将继续只有一个用户。
要连接到MongoDB,请通过Nuget添加名为MongoDB.Driver的包。这是.NET的新官方驱动程序,完全支持ASP.NET Core应用程序。
与笔记本中每个条目关联的模型类(POCO)包括以下内容:
using System;
using MongoDB.Bson.Serialization.Attributes;

namespace NotebookAppApi.Model
{
	public class Note
	{
		[BsonId]
		// standard BSonId generated by MongoDb
		public ObjectId InternalId { get; set; }

		// external Id, easier to reference: 1,2,3 or A, B, C etc.
		public string Id { get; set; }

		public string Body { get; set; } = string.Empty;

		[BsonDateTimeOptions]
                // attribute to gain control on datetime serialization
		public DateTime UpdatedOn { get; set; } = DateTime.Now;

		public NoteImage HeaderImage { get; set; }

		public int UserId { get; set; } = 0;
	}
}
注意:默认情况下,使用参数 BsonDateTimeOptions,Bson序列化程序尝试将序列化为DateTime和UTC。如下添加特性[BsonDateTimeOptions(Kind = DateTimeKind.Local)],我们允许保存本地时间:
假设Note带有标题图像,下面是一个示例嵌入式类:
public class NoteImage
{
	public string Url { get; set; } = string.Empty;
	public string ThumbnailUrl { get; set; } = string.Empty;
	public long ImageSize { get; set; } = 0L;
}为了将访问数据库的功能保留在不同的位置,我们将添加一个NoteContext类。这将使用上面定义的设置。
public class NoteContext
{
    private readonly IMongoDatabase _database = null;

    public NoteContext(IOptions settings)
    {
        var client = new MongoClient(settings.Value.ConnectionString);
        if (client != null)
            _database = client.GetDatabase(settings.Value.Database);
    }

    public IMongoCollection Notes
    {
        get
        {
            return _database.GetCollection("Note");
        }
    }
}使用存储库接口,我们将实现管理Notes所需的功能。这些还将使用依赖注入(DI)来从应用程序(例如,控制器部分)轻松访问:
public interface INoteRepository
{
	Task GetAllNotes();
	Task GetNote(string id);

	// query after multiple parameters
	Task GetNote(string bodyText, DateTime updatedFrom, long headerSizeLimit);

	// add new note document
	Task AddNote(Note item);

	// remove a single document / note
	Task RemoveNote(string id);

	// update just a single document / note
	Task UpdateNote(string id, string body);

	// demo interface - full document update
	Task UpdateNoteDocument(string id, string body);

	// should be used with high cautious, only in relation with demo setup
	Task RemoveAllNotes();
}
对数据库的访问将是异步的。我们在这里使用新的驱动程序,它提供了完整的异步堆栈。
举个例子:要获取所有Notes,我们提出一个异步请求:
public async Task GetAllNotes()
{
    var documents = await _context.Notes.Find(_ => true).ToListAsync();
    return documents;
}
这是所有基本CRUD操作的完整实现:
public class NoteRepository : INoteRepository
{
	private readonly NoteContext _context = null;

	public NoteRepository(IOptions settings)
	{
		_context = new NoteContext(settings);
	}

	public async Task GetAllNotes()
	{
		try
		{
			return await _context.Notes
					.Find(_ => true).ToListAsync();
		}
		catch (Exception ex)
		{
			// log or manage the exception
			throw ex;
		}
	}

	// query after Id or InternalId (BSonId value)
	//
	public async Task GetNote(string id)
	{
		try
		{
			ObjectId internalId = GetInternalId(id);
			return await _context.Notes
							.Find(note => note.Id == id
									|| note.InternalId == internalId)
							.FirstOrDefaultAsync();
		}
		catch (Exception ex)
		{
			// log or manage the exception
			throw ex;
		}
	}

	// query after body text, updated time, and header image size
	//
	public async Task GetNote(string bodyText, DateTime updatedFrom, long headerSizeLimit)
	{
		try
		{
			var query = _context.Notes.Find(note => note.Body.Contains(bodyText) &&
								   note.UpdatedOn >= updatedFrom &&
								   note.HeaderImage.ImageSize  0;
		}
		catch (Exception ex)
		{
			// log or manage the exception
			throw ex;
		}
	}

	public async Task UpdateNote(string id, string body)
	{
		var filter = Builders.Filter.Eq(s => s.Id, id);
		var update = Builders.Update
						.Set(s => s.Body, body)
						.CurrentDate(s => s.UpdatedOn);

		try
		{
			UpdateResult actionResult
				= await _context.Notes.UpdateOneAsync(filter, update);

			return actionResult.IsAcknowledged
				&& actionResult.ModifiedCount > 0;
		}
		catch (Exception ex)
		{
			// log or manage the exception
			throw ex;
		}
	}

	public async Task UpdateNote(string id, Note item)
	{
		try
		{
			ReplaceOneResult actionResult
				= await _context.Notes
								.ReplaceOneAsync(n => n.Id.Equals(id)
										, item
										, new UpdateOptions { IsUpsert = true });
			return actionResult.IsAcknowledged
				&& actionResult.ModifiedCount > 0;
		}
		catch (Exception ex)
		{
			// log or manage the exception
			throw ex;
		}
	}

	// Demo function - full document update
	public async Task UpdateNoteDocument(string id, string body)
	{
		var item = await GetNote(id) ?? new Note();
		item.Body = body;
		item.UpdatedOn = DateTime.Now;

		return await UpdateNote(id, item);
	}

	public async Task RemoveAllNotes()
	{
		try
		{
			DeleteResult actionResult
				= await _context.Notes.DeleteManyAsync(new BsonDocument());

			return actionResult.IsAcknowledged
				&& actionResult.DeletedCount > 0;
		}
		catch (Exception ex)
		{
			// log or manage the exception
			throw ex;
		}
	}
}
为了使用DI模型访问NoteRepository,我们在ConfigureServices中添加了一行
services.AddTransient();其中:
-
瞬态(Transient):每次创建。
-
范围(Scoped):每个请求仅创建一次。
-
单例(Singleton):在首次请求时创建。每个后续请求都使用第一次创建的实例。
首先,我们介绍主控制器。它提供了所有CRUD接口,可供外部应用程序使用。该获取的行为有NoCache的指令,以确保Web客户端使经常对服务器的请求。
[Produces("application/json")]
[Route("api/[controller]")]
public class NotesController : Controller
{
	private readonly INoteRepository _noteRepository;

	public NotesController(INoteRepository noteRepository)
	{
		_noteRepository = noteRepository;
	}

	[NoCache]
	[HttpGet]
	public async Task Get()
	{
		return await _noteRepository.GetAllNotes();
	}

	// GET api/notes/5 - retrieves a specific note using either Id or InternalId (BSonId)
	[HttpGet("{id}")]
	public async Task Get(string id)
	{
		return await _noteRepository.GetNote(id) ?? new Note();
	}

	// GET api/notes/text/date/size
	// ex: http://localhost:53617/api/notes/Test/2018-01-01/10000
	[NoCache]
	[HttpGet(template: "{bodyText}/{updatedFrom}/{headerSizeLimit}")]
	public async Task Get(string bodyText,
											 DateTime updatedFrom,
											 long headerSizeLimit)
	{
		return await _noteRepository.GetNote(bodyText, updatedFrom, headerSizeLimit)
					?? new List();
	}

	// POST api/notes - creates a new note
	[HttpPost]
	public void Post([FromBody] NoteParam newNote)
	{
		_noteRepository.AddNote(new Note
									{
										Id = newNote.Id,
										Body = newNote.Body,
										CreatedOn = DateTime.Now,
										UpdatedOn = DateTime.Now,
										UserId = newNote.UserId
									});
	}

	// PUT api/notes/5 - updates a specific note
	[HttpPut("{id}")]
	public void Put(string id, [FromBody]string value)
	{
		_noteRepository.UpdateNoteDocument(id, value);
	}

	// DELETE api/notes/5 - deletes a specific note
	[HttpDelete("{id}")]
	public void Delete(string id)
	{
		_noteRepository.RemoveNote(id);
	}
}这将是专用于管理任务的控制器(我们使用一些虚假数据来初始化数据库)。在实际的项目中,我们应该非常谨慎地使用这样的接口。仅出于开发目的和快速测试的目的,此方法可能很方便。
要使用它,我们只需将URL添加到浏览器中。运行下面的代码,将自动创建完整的设置(例如,新数据库,新集合,样本记录)。我们可以使用http://localhost:5000/api/system/init(使用IIS时)或 http://localhost:53617/api/system/init (使用IIS Express时,在此示例项目中默认启用) 。我们甚至可以扩展想法,添加更多命令。但是,如上所述,这类方案应仅用于开发,决不能部署到生产环境中。
[Route("api/[controller]")]
public class SystemController : Controller
{
	private readonly INoteRepository _noteRepository;

	public SystemController(INoteRepository noteRepository)
	{
		_noteRepository = noteRepository;
	}

	// Call an initialization - api/system/init
	[HttpGet("{setting}")]
	public string Get(string setting)
	{
		if (setting == "init")
		{
			_noteRepository.RemoveAllNotes();
			var name = _noteRepository.CreateIndex();

			_noteRepository.AddNote(new Note()
			{
				Id = "1",
				Body = "Test note 1",
				UpdatedOn = DateTime.Now,
				UserId = 1,
				HeaderImage = new NoteImage
				{
					ImageSize = 10,
					Url = "http://localhost/image1.png",
					ThumbnailUrl = "http://localhost/image1_small.png"
				}
			});

			_noteRepository.AddNote(new Note()
			{
				Id = "2",
				Body = "Test note 2",
				UpdatedOn = DateTime.Now,
				UserId = 1,
				HeaderImage = new NoteImage
				{
					ImageSize = 13,
					Url = "http://localhost/image2.png",
					ThumbnailUrl = "http://localhost/image2_small.png"
				}
			});

			_noteRepository.AddNote(new Note()
			{
				Id = "3",
				Body = "Test note 3",
				UpdatedOn = DateTime.Now,
				UserId = 1,
				HeaderImage = new NoteImage
				{
					ImageSize = 14,
					Url = "http://localhost/image3.png",
					ThumbnailUrl = "http://localhost/image3_small.png"
				}
			});

			_noteRepository.AddNote(new Note()
			{
				Id = "4",
				Body = "Test note 4",
				UpdatedOn = DateTime.Now,
				UserId = 1,
				HeaderImage = new NoteImage
				{
					ImageSize = 15,
					Url = "http://localhost/image4.png",
					ThumbnailUrl = "http://localhost/image4_small.png"
				}
			});

			return "Database NotesDb was created, and collection 'Notes' was filled with 4 sample items";
		}

		return "Unknown";
	}
}为了快速显示值,项目一旦运行,请更新文件launchSettings.json。
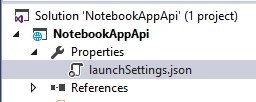
这是完整的文件内容,默认情况下指向api/notes网址。
{
  "iisSettings": {
    "windowsAuthentication": false,
    "anonymousAuthentication": true,
    "iisExpress": {
      "applicationUrl": "http://localhost:53617/",
      "sslPort": 0
    }
  },
  "profiles": {
    "IIS Express": {
      "commandName": "IISExpress",
      "launchBrowser": true,
      "launchUrl": "api/notes",
      "environmentVariables": {
        "ASPNETCORE_ENVIRONMENT": "Development"
      }
    },
    "NotebookAppApi": {
      "commandName": "Project",
      "launchBrowser": true,
      "launchUrl": "http://localhost:5000/api/notes",
      "environmentVariables": {
        "ASPNETCORE_ENVIRONMENT": "Development"
      }
    }
  }
}在运行项目之前,请确保MongoDB正在运行(作为Windows服务或通过控制台应用程序运行,如上所述)。
首先运行初始化链接:http://localhost:53617/api/system/init
然后运行默认的应用程序链接http://localhost:53617/api/notes

使用Robo 3T,我们可以检查数据库中的实际条目。使用凭据连接到数据库,我们可以看到所有记录。
即使唯一ID的名称为_id,MongoDb .NET Driver也会使用标签[BsonId]将其映射到我们的变量InternalId。

该示例的完整资源可在GitHub-> https://github.com/fpetru/WebApiMongoDB上找到。
允许跨域调用(CORS)作为不同的应用程序,它们运行在单独的域上,所有对ASP.NET WebAPI站点的调用实际上都是跨域调用。对于Angular 2,首先有一个预请求,然后是实际请求(OPTIONS请求)。在进行此预检查之前,我们首先确认允许跨域调用(CORS)。
我通过应用两个更改启用了CORS:
-
首先在Startup.cs的ConfigureServices()方法中注册CORS功能:
public void ConfigureServices(IServiceCollection services)
{
     // Add service and create Policy with options
     services.AddCors(options => { options.AddPolicy("CorsPolicy",
                                     builder => builder.AllowAnyOrigin()
                                                       .AllowAnyMethod()
                                                       .AllowAnyHeader()
                                                       .AllowCredentials());
                                 });
     // ....

     services.AddMvc();
}-
然后在UseMVC之前,通过在Startup的Configure()方法中调用app.useCors()在应用程序中的每个请求上全局启用策略。
public void Configure(IApplicationBuilder app)
{
   // ...

   // global policy, if assigned here (it could be defined individually for each controller)
   app.UseCors("CorsPolicy");

   // ...

   // We define UseCors() BEFORE UseMvc, below just a partial call
   app.UseMvc(routes => {
}
即使可以更进一步,更有选择性地应用它,本文其余部分也保持不变。
最初,示例项目仅包含属性的选择性更新。使用ReplaceOneAsync,我们可以更新整个文档。如果尚不存在,Upsert将创建该文档。
public async Task UpdateNote(string id, Note item)
{
     return await _context.Notes
                          .ReplaceOneAsync(n => n.Id.Equals(id)
                                            , item
                                            , new UpdateOptions { IsUpsert = true });
}为了能够测试更新,我使用了Postman。它是测试API的出色工具。
我选择了命令类型POST,然后输入了本地URL,并添加了一个新的Header(Content-Type是application/json)。

然后将“主体”设置为“原始”并更新虚拟值。
使用RoboMongo,我们可以看到更新的值。
从C#5.0开始, 该语言引入了async 和 await来简化任务并行库的使用。我们可以简单地使用try/catch块来捕获异常,如下所示:
public async Task GetAllNotes()
{
    try
    {
        return await _context.Notes.Find(_ => true).ToListAsync();
    }
    catch (Exception ex)
    {
        // log or manage the exception
        throw ex;
    }
}
通过这种方式,我们通过使用await异步地等待有故障的任务来完成它。这将重新引发原始存储的异常。
最初,我使用void作为返回值。更改返回类型后,异步方法中引发的异常将安全地保存在返回的Task实例中。当我们等待错误的方法时,保存在Task中的异常将被重新抛出,并保留其完整的堆栈跟踪。
public async Task AddNote(Note item)
{
    try
    {
        await _context.Notes.InsertOneAsync(item);
    }
    catch (Exception ex)
    {
        // log or manage the exception
        throw ex;
    }
}模型绑定是将原始HTTP请求转换为控制器上的操作方法调用的参数。[FromBody]参数告诉.net core框架使用请求的content-type标头,以决定使用哪个已配置的IInputFormatters进行模型绑定。
默认情况下,当您在Startup.cs中调用AddMvc()时,将自动配置JSON格式(JsonInputFormatter)。如果需要,可以添加其他格式化程序,例如将XML绑定到对象。
[HttpPost]
public void Post([FromBody] NoteParam newNote)
要添加新的Note,我们首先需要将Content-Type设置为application/json。

然后,我们发送一个JSON对象,并成功添加了一个新的Note。由于未设置UserId,因此该对象将采用默认值。
MongoDB的CSharp驱动程序使对嵌入式文档的查询变得容易。在下面的示例中,我们混合使用了两个过滤器,一个过滤器比较主文档中的日期,另一个过滤器比较嵌套类的long 成员。
note.UpdatedOn >= updatedFrom && note.HeaderImage.ImageSize
关注
打赏
最近更新
- 深拷贝和浅拷贝的区别(重点)
- 【Vue】走进Vue框架世界
- 【云服务器】项目部署—搭建网站—vue电商后台管理系统
- 【React介绍】 一文带你深入React
- 【React】React组件实例的三大属性之state,props,refs(你学废了吗)
- 【脚手架VueCLI】从零开始,创建一个VUE项目
- 【React】深入理解React组件生命周期----图文详解(含代码)
- 【React】DOM的Diffing算法是什么?以及DOM中key的作用----经典面试题
- 【React】1_使用React脚手架创建项目步骤--------详解(含项目结构说明)
- 【React】2_如何使用react脚手架写一个简单的页面?


微信扫码登录