
微服务提供者demo-pay
第一步:创建模块demo-pay添加依赖:
<dependency> <groupId>org.springframework.boot</groupId> <artifactId>spring-boot-starter-web</artifactId> </dependency> <dependency> <groupId>org.springframework.boot</groupId> <artifactId>spring-boot-starter-actuator</artifactId> </dependency> <!--热部署相关--> <dependency> <groupId>org.springframework.boot</groupId> <artifactId>spring-boot-devtools</artifactId> </dependency> <dependency> <groupId>org.springframework.boot</groupId> <artifactId>spring-boot-starter-test</artifactId> <scope>test</scope> </dependency> <dependency> <groupId>com.alibaba.cloud</groupId> <artifactId>spring-cloud-starter-alibaba-nacos-discovery</artifactId> </dependency>第二步:修改application.yml:
server: port: 8801 servlet: context-path: /pay
spring: application: name: nacos-pay
  cloud: nacos: discovery: server-addr: http://localhost:8848 # 配置Nacos地址
management: endpoints: web: exposure: include: '*' # 对外暴露出所有的端点
第三步:项目主启动类添加注解
@EnableDiscoveryClient第四步:提供控制器PayController:
@RestController public class PayController { @GetMapping("/fun/{id}") public String fun(@PathVariable("id") Long id) { System.out.println("1111111111111111"); return "支付 id: " + id; } }
微服务消费者demo-sentinel-openfeign
第一步:创建模块demo-sentinel-openfeign并添加依赖:
<dependency> <groupId>org.springframework.boot</groupId> <artifactId>spring-boot-starter-web</artifactId> </dependency> <dependency> <groupId>org.springframework.boot</groupId> <artifactId>spring-boot-starter-actuator</artifactId> </dependency> <!--热部署相关--> <dependency> <groupId>org.springframework.boot</groupId> <artifactId>spring-boot-devtools</artifactId> </dependency> <dependency> <groupId>org.springframework.boot</groupId> <artifactId>spring-boot-starter-test</artifactId> <scope>test</scope> </dependency> <dependency> <groupId>com.alibaba.cloud</groupId> <artifactId>spring-cloud-starter-alibaba-sentinel</artifactId> </dependency> <dependency> <groupId>com.alibaba.cloud</groupId> <artifactId>spring-cloud-starter-alibaba-nacos-discovery</artifactId> </dependency> <dependency> <groupId>com.alibaba.csp</groupId> <artifactId>sentinel-datasource-nacos</artifactId> </dependency> <!--避免出现警告信息:Spring Cloud LoadBalancer is currently working with the default cache. You can switch to using Caffeine cache, by adding it and org.springframework.cache.caffeine.CaffeineCacheManager to the classpath.--> <dependency> <groupId>com.github.ben-manes.caffeine</groupId> <artifactId>caffeine</artifactId> <version>3.1.1</version> </dependency> <!-- nacos自从2020版本之后不再整合的是Netflix,也就没有ribbon了 --> <dependency> <groupId>org.springframework.cloud</groupId> <artifactId>spring-cloud-starter-loadbalancer</artifactId> <version>3.0.1</version> </dependency> <dependency> <groupId>org.springframework.cloud</groupId> <artifactId>spring-cloud-starter-openfeign</artifactId> <version>3.0.1</version> </dependency>第二步:修改application.yml
server: port: 6601 servlet: context-path: /sentinelfeign

spring: application: name: sentinel-feign
  cloud: nacos: discovery: server-addr: localhost:8848 # 配置nacos地址
    sentinel: transport: # 配置sentinel dashboard地址
        dashboard: localhost:8080 # 默认端口8719,假如被占用会自动从8719开始依次+1扫描,直至找到未被占用的端口
        port: 8719 management: endpoints: web: exposure: include: '*' #暴露出所有的端点
# 激活Sentinel对Feign的支持
feign: sentinel: enabled: true
第三步:在项目主启动类上添加注解:
@EnableFeignClients @EnableDiscoveryClient第四步:创建Feign接口:
@Service //name:指定调用Rest接口所对应的服务名 //path:指定要调用的Rest接口所在的Controller指定的RequestMapping,如果Rest接口所在的Controller没有指定RequestMapping,则不用指定 @FeignClient(name = "nacos-pay", path = "/pay", fallback = PayFeignServiceFallback.class) public interface PayFeignService { @GetMapping("/fun/{id}") public String fun(@PathVariable("id") Long id); }
第五步:创建兜底类:
@Component public class PayFeignServiceFallback implements PayFeignService { @Override public String fun(Long id) { return "兜底 服务降级: " + id; } }
第六步:创建测试Controller
@RestController public class DemoCtroller { @Resource private PayFeignService payFeignService; @GetMapping("/fun1") public String fun1(Long a) { String res = payFeignService.fun(a); return "fun1 "+res; } }
测试:
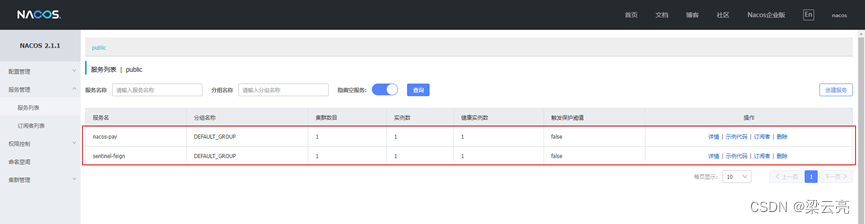
第一步:依次启动软件Nacos和Sentinel,然后再分别启动项目demo-pay和demo-sentinel-openfeign。
第二步:结果:
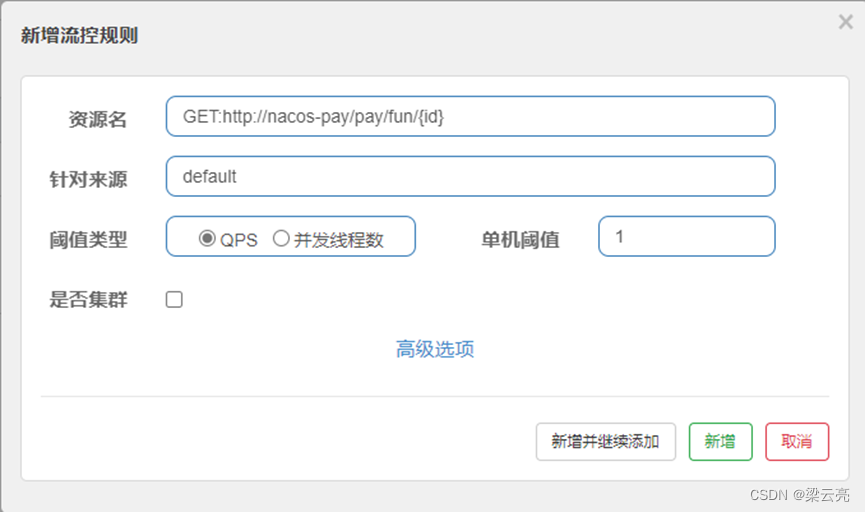
添加流控规则:

请求消费者中的示例控制器中的api接口:
低频访问:

高频访问:


